How to Access Accessibility Controls From the Menu Bar and Control Center on Mac |
- How to Access Accessibility Controls From the Menu Bar and Control Center on Mac
- How to Turn on Dark Mode on Mac
- Xbox Series X Review
- How to Pin Control Center Modules to the Menu Bar on Mac
- How to Launch Chrome with a Keyboard Shortcut in Windows 10
| How to Access Accessibility Controls From the Menu Bar and Control Center on Mac Posted: 13 Nov 2020 07:30 AM PST  Apple includes accessibility features in its devices that help users with vision, physical, and motor impairments. Some settings, like "Reduce Transparency," can help everyone. Here's how to quickly access accessibility features from the Menu Bar or Control Center on Mac. If you're running macOS Big Sur and newer, you can access these features right from the Menu Bar or using the Control Center. The Accessibility Shortcuts menu brings many frequently used accessibility features, like grayscale mode, to the forefront so you won't need to go to System Preferences every time you want to enable or disable a feature. RELATED: What’s New in macOS 11.0 Big Sur, Arriving November 12, 2020 Accessibility Shortcuts is an extra module that you can add to the end of the Control Center, and it can be added directly to the Menu Bar. Once added, you'll have access to features like "Voice Over," "Zoom," "Invert Colors," "Color Filters," "Increase Contrast," "Reduce Transparency," "Sticky Keys," "Slow Keys," "Mouse Keys," "Accessibility Keyboard," and "Head Pointer." To do this, click the "Apple" icon from the "Menu Bar" and then choose the "System Preferences" option.
Here, click on the "Dock & Menu Bar" button.
From the sidebar, scroll down and choose the "Accessibility Shortcuts" option. Then, click the checkmark next to the "Show in Control Center" and "Show in Menu Bar" options. You can come back here and uncheck the options to remove the "Accessibility Shortcuts" icons.
To access "Accessibility Shortcuts" from the "Control Center," click the "Control Center" icon from the top-right corner of your Mac's screen.
Now, click the new "Accessibility Shortcuts" icon from the bottom of the "Control Center" (or the "Menu Bar").
The menu will expand and you'll see every Accessibility Shortcuts.
You can also drag and drop the "Accessibility Shortcuts" icon from the "Control Center" to the "Menu Bar" to pin it to the "Menu Bar." To remove it, hold the "Command" key, drag the button out to the desktop and then let go.
Now, just click an accessibility feature to enable or disable it.
Finding Mac's user interface a bit unclear? Increase the contrast to see outlines around all interface elements. This can help you easily discern between interactive buttons, text boxes, and read-only elements on macOS. |
| How to Turn on Dark Mode on Mac Posted: 13 Nov 2020 05:59 AM PST  Your Apple Mac or MacBook has a dark mode that can help you work better at night and in low-light. Once enabled, supported apps and websites automatically switch to a dark background with white text. Here's how to enable dark mode on Mac. How to Enable Dark Mode From Control CenterDark mode was first introduced with macOS Mojave. You could enable or disable it from the System Preferences. Mac users who are running macOS Big Sur and newer can now enable or disable dark mode right from the Control Center.
Click the "Control Center" icon from the top-right corner of your screen.
From the Control Center drop-down window, click the "Display" module.
The Display module will now expand. Here, select the "Dark Mode" button to enable or disable the feature.
How to Add a Dark Mode Toggle to Menu BarWith previous versions of macOS, you needed a third-party app to access a dark mode toggle from the menu bar. Thanks to the Control Center introduced in Big Sur, you can add this toggle to the menu bar without installing anything. Open the "Control Center" on your Mac and then drag and drop the "Display" panel to the menu bar.
The Display panel will turn into an icon and sit permanently in your Mac's menu bar. Click the "Display" button to expand the window. From here, select the "Dark Mode" button to quickly enable or disable the visual feature.
You can rearrange or remove the "Display" icon from the menu bar quite easily. Press and hold the "Command" key and then drag and drop the Display icon to where you want to move it. If you want to remove the "Display" icon, drag the icon out to the "Desktop" and then let go.
How to Enable Dark Mode from System PreferencesIf you're using macOS Mojave or Catalina on your Mac, you don't have access to the Control Center. Thankfully, you can enable or disable dark mode from System Preferences on any modern version of macOS. Click the "Apple" button from the menu bar and choose the "System Preferences" option.
Here, go to the "General" section.
From the "Appearance" section, you can switch between the "Light" and "Dark" modes.
How to Schedule Dark Mode on MacmacOS can also enable or disable dark mode automatically based on the time of the day. Go to System Preferences > General, and from the "Appearance" section, choose the "Auto" option.
Once this option is enabled, macOS will automatically enable dark mode in the evening. And when you open up your Mac in the morning, macOS will be back in light mode. If you want to enable dark mode at a specific time, you can use a third-party app called NightOwl. It's a free menu bar utility that works with macOS Mojave and higher. The utility also serves as a quick-switch for enabling and disabling dark mode from the menu bar. Simply right-clicking the "NightOwl" icon from the menu bar enables or disables dark mode. After NightOwl is installed and you have approved permissions, you can click the "NightOwl" button and enable the "Scheduled" feature. Then, enter the time when you want to enable the Light or Dark mode.
Want to force websites to switch to dark mode as well? Here's how you can make that happen in Safari and Chrome. |
| Posted: 12 Nov 2020 01:31 PM PST
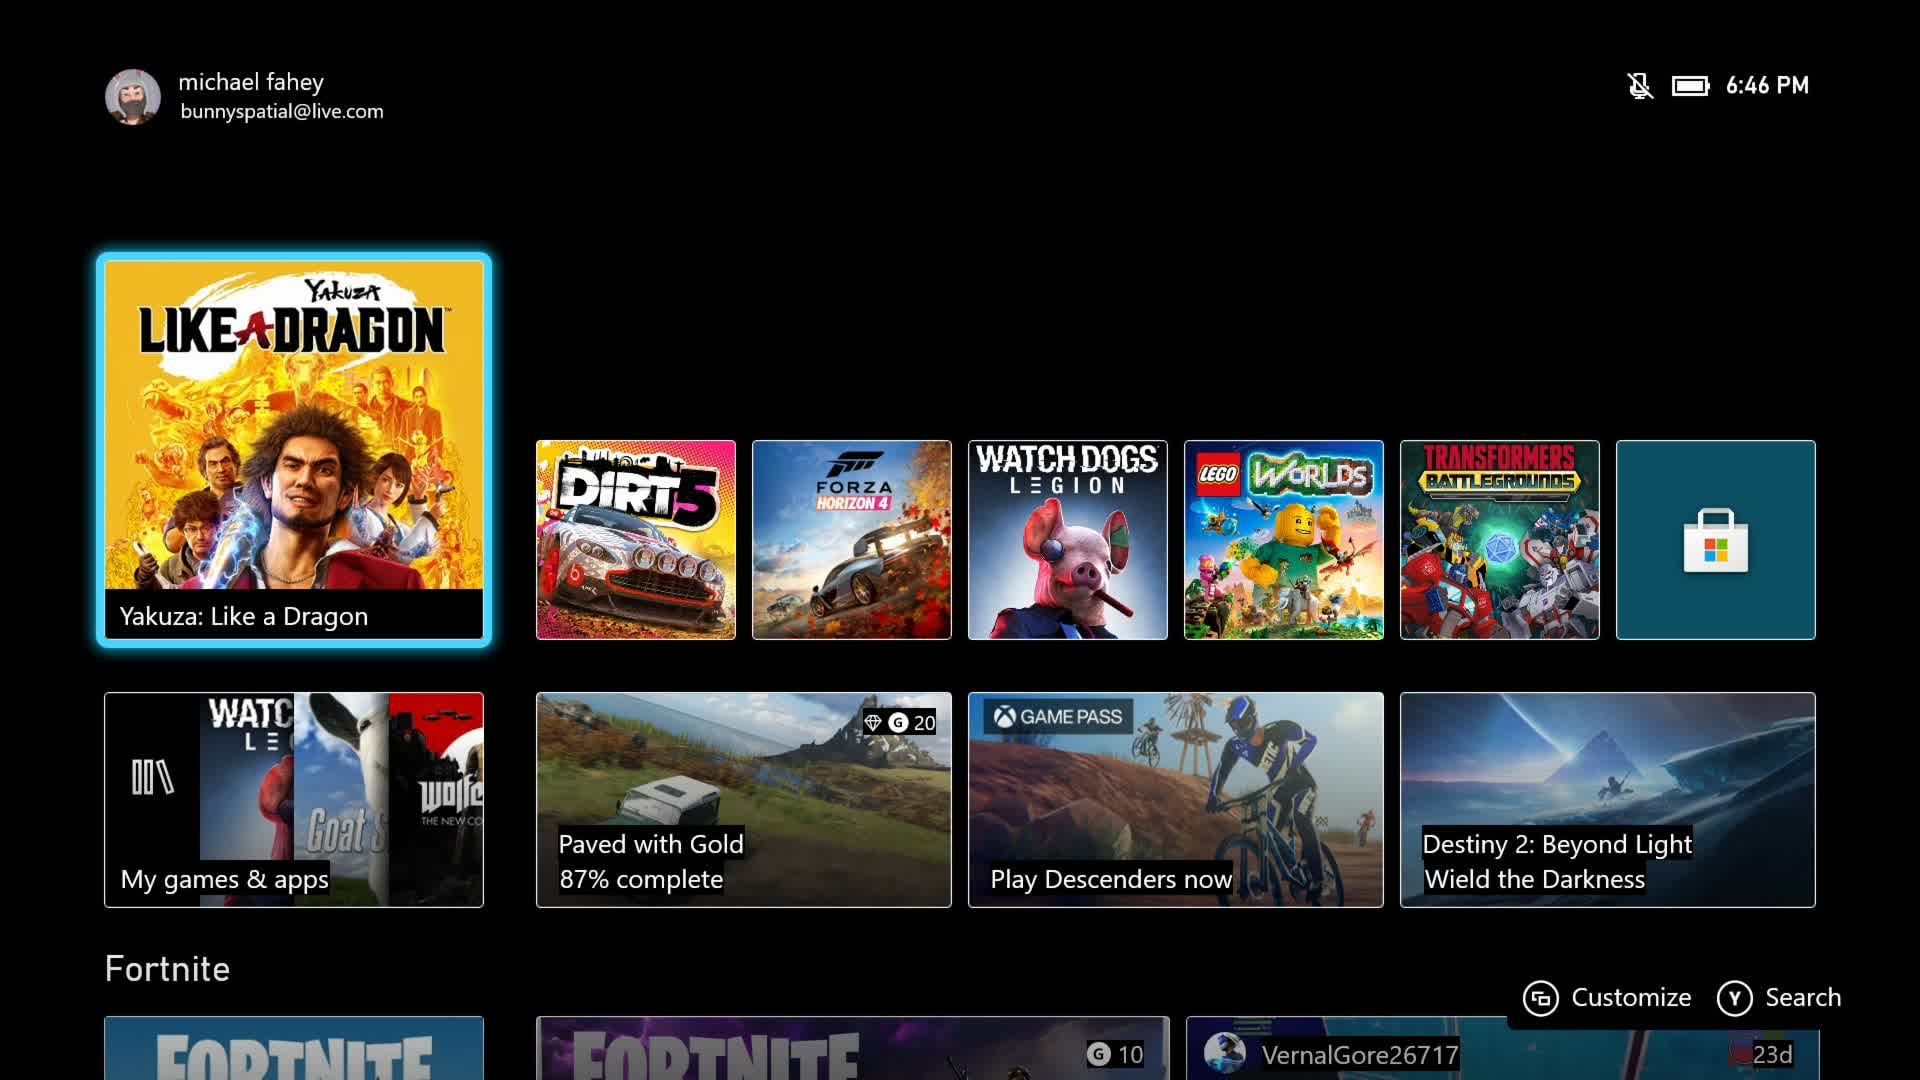
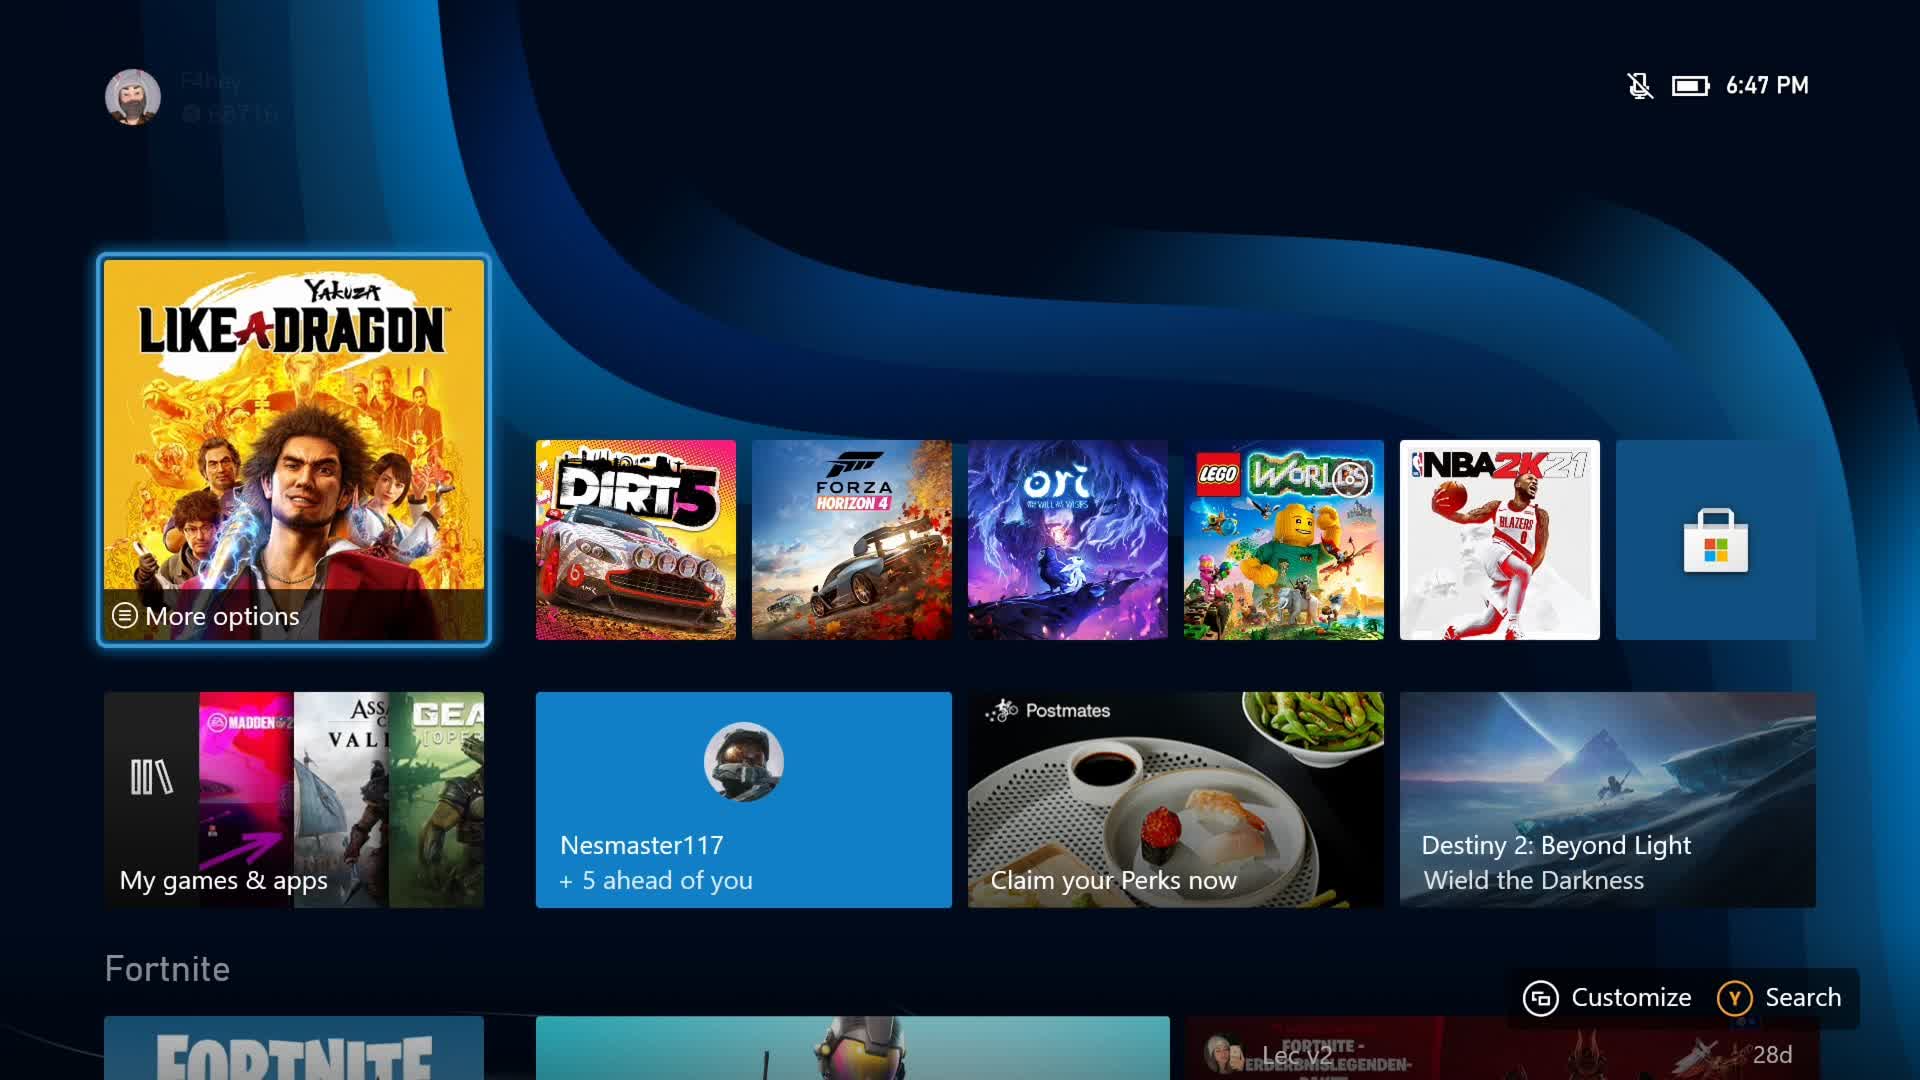
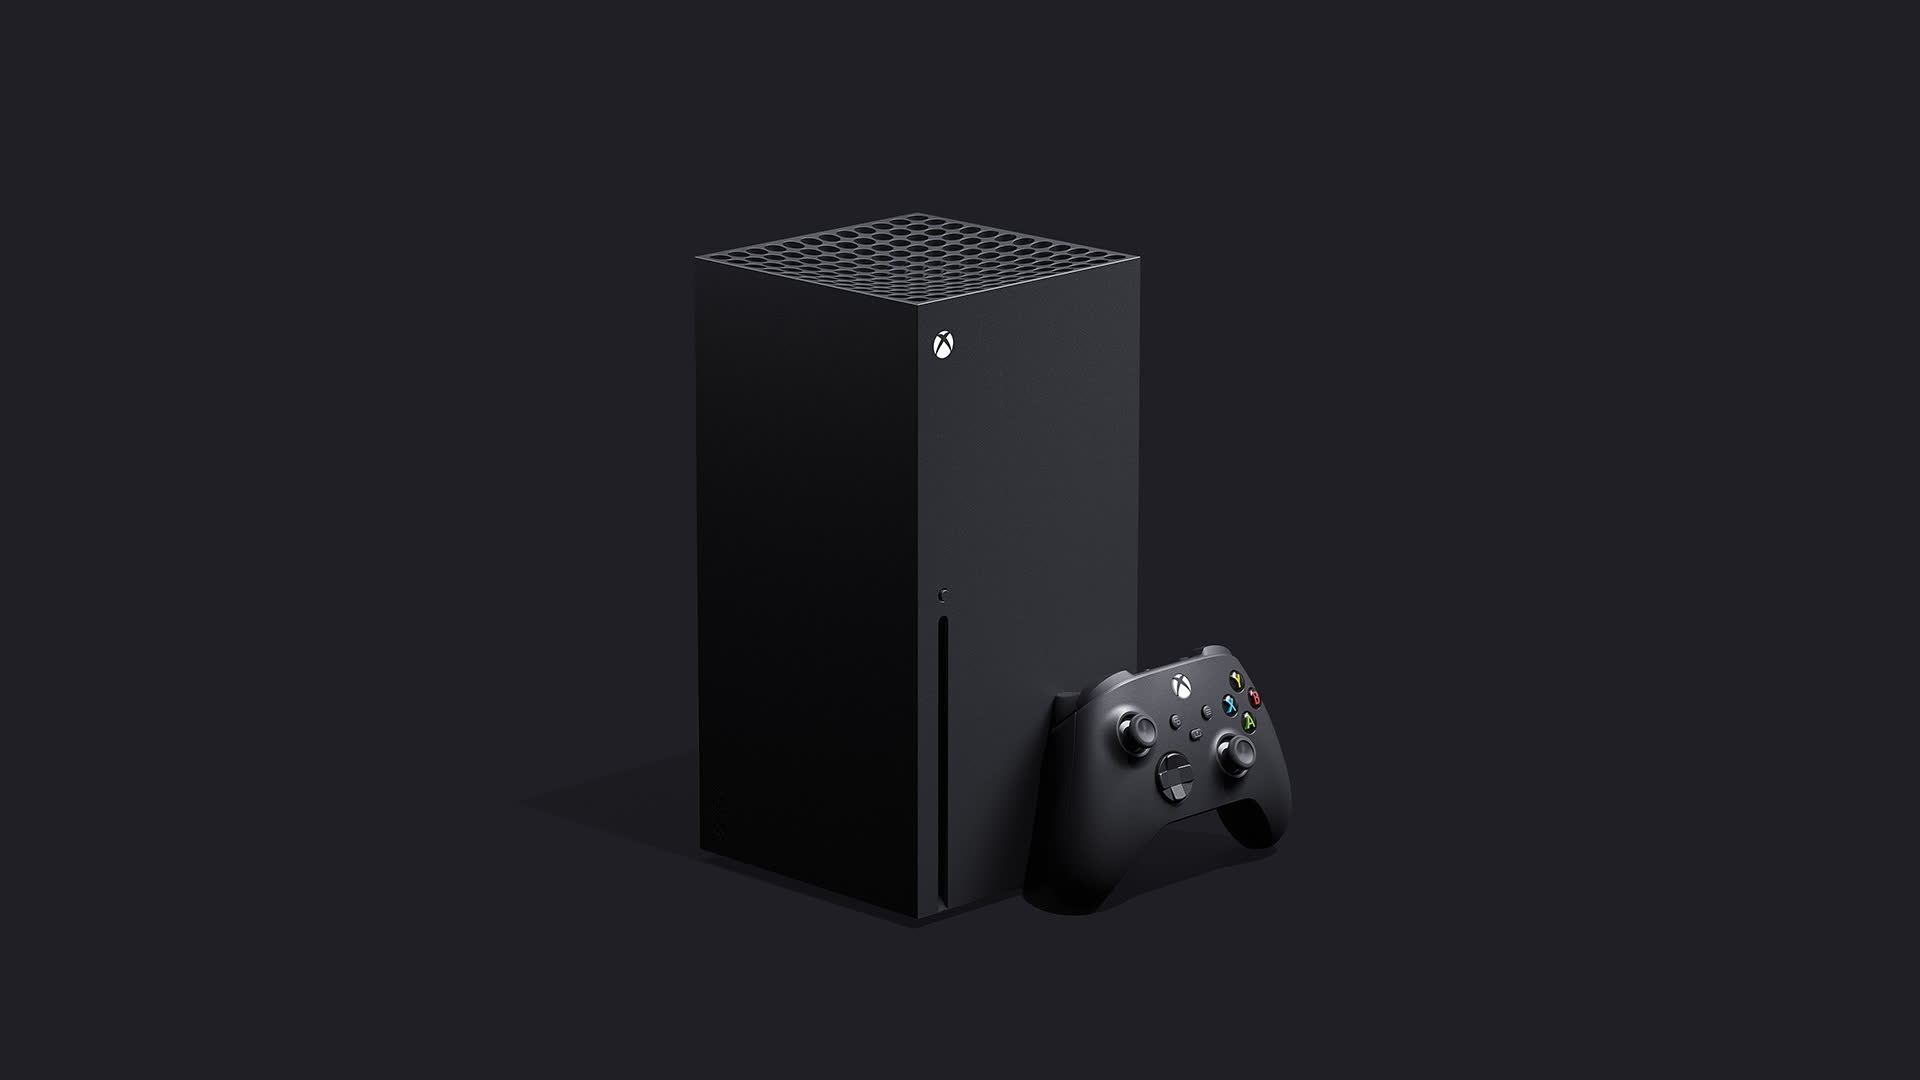
Instead, the Series X feels like another version of Microsoft's last console, the Xbox One. It feels like a much more powerful Xbox One with a striking new look, blazing-fast loading times, and an extra button on its controller. For many reasons, it's the very best Xbox One. The Xbox Series X is the most boxlike Xbox that Microsoft has ever produced. It's a cuboid: 12 inches tall, six inches deep, and six inches wide, all right angles and fine matte black plastic. I adore its simplicity. It's a box with a modest, circular X-logo button in the top left or top right corner, depending on whether you place it horizontally or vertically. Pressing that button causes the system to emit the same three-note beep as pressing the circular X-logo button on the Xbox One. From there the system launches into its home screen, seen below.
Hold up, that's not the right screenshot. That's a screen from my Xbox One X. Here's my Xbox Series X home screen…
Every game on my Xbox One runs on my Xbox Series X. That includes nearly every backward compatible game for the Xbox 360 and original Xbox. The only games that will not work are those that require Kinect, Microsoft's failed spy camera accessory. How does the Xbox Series X achieve such awesome backward compatibility? Simple. It's an Xbox One with more powerful guts. In 2017 I said that the Xbox One X, Microsoft's incremental upgrade to the Xbox One, is "a box filled with powerful components that's designed to do the same thing as a box with less powerful components, only a little bit better." Replace "a little bit" with "a lot" and you've got the Xbox Series X. It does 4K resolution more readily than the Xbox One X. It reaches 60 frames-per-second more readily at higher resolutions. That additional graphics power means the Xbox Series X can reach up to 120 frames-per-second at lower resolutions, liquid-smooth frame rates once purely the domain of gaming PCs. It can even output graphics at 8K, which to many entertainment consumers is still some sort of mythical beast. (Note: Alongside the X, Microsoft is launching a second, cheaper new console called the Xbox Series S. More on that one at the end of this review.) By using a faster processor, doubling the graphics power, installing more, speedier memory, and including a solid-state storage drive set to ludicrous speed, Microsoft has created the ultimate Xbox One. It makes sense. Those are the components I would upgrade in my PC if I wanted the games I have there to perform better.
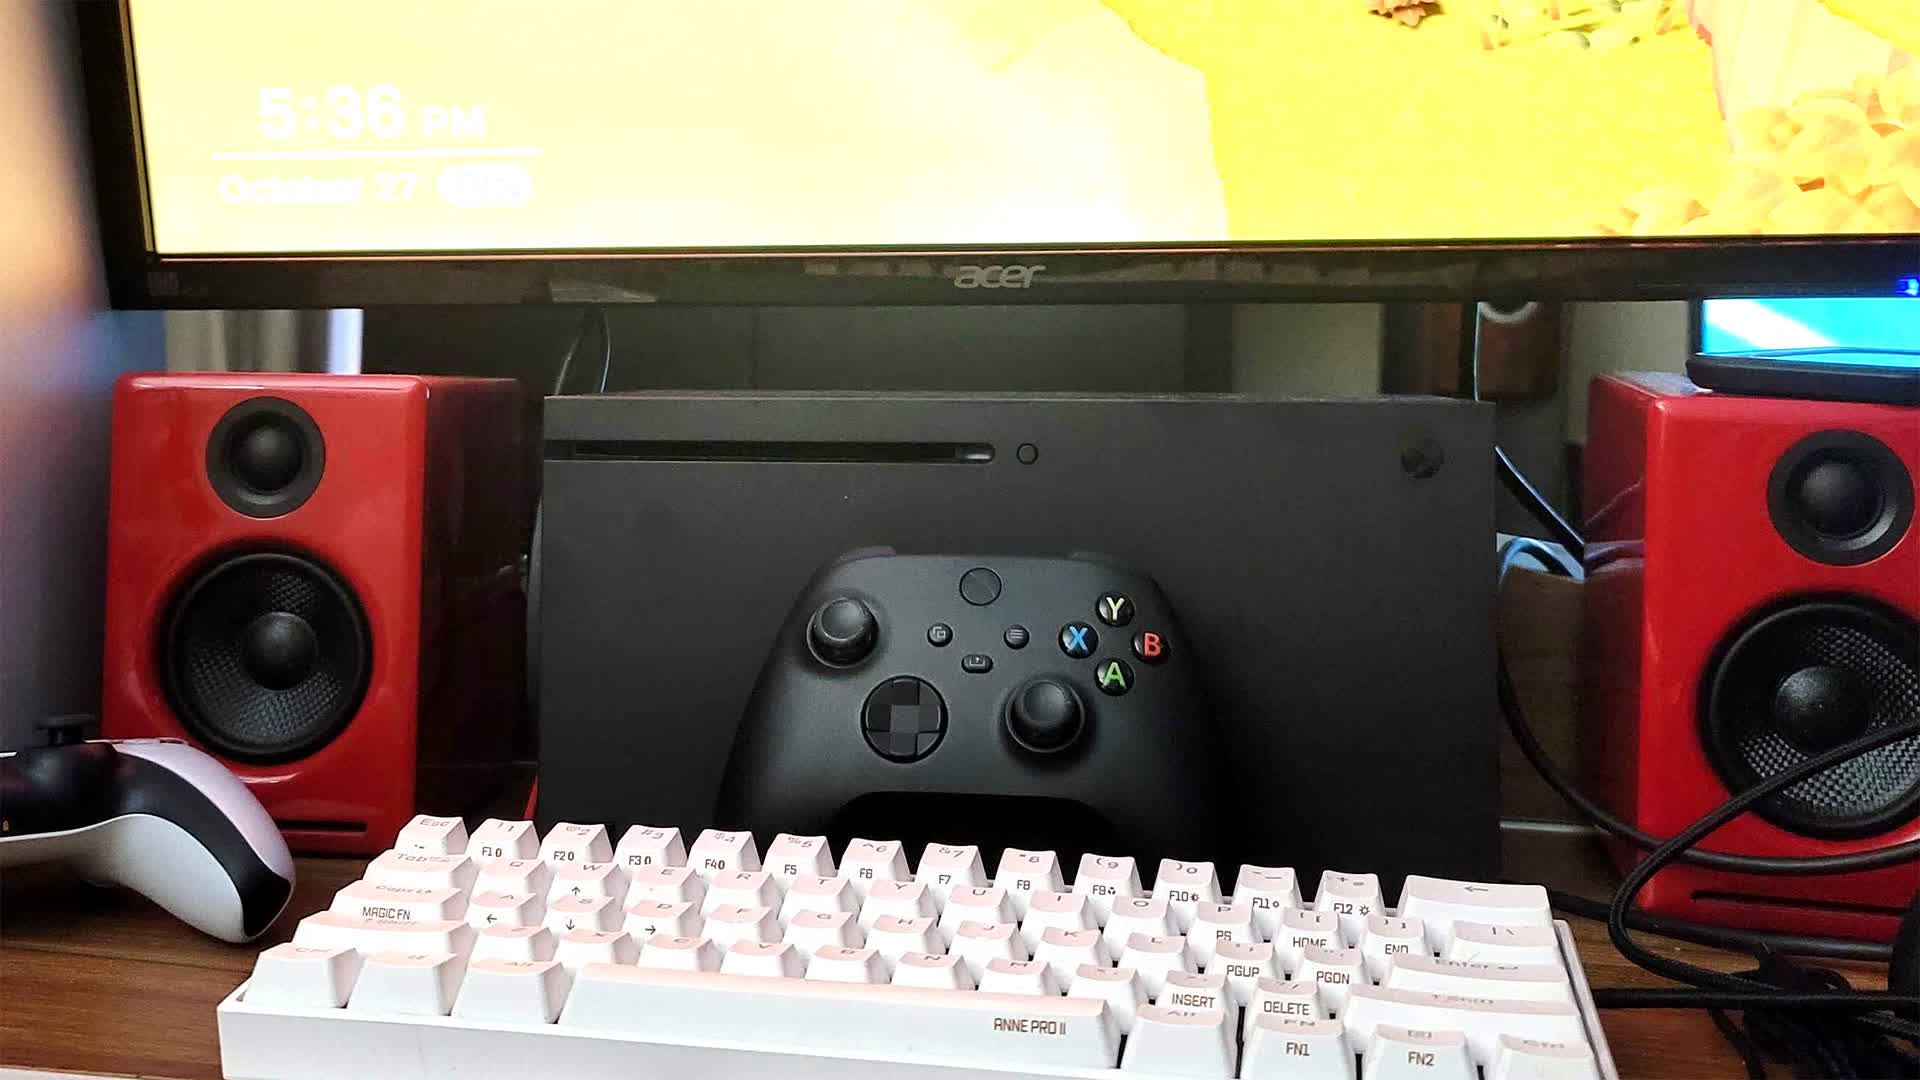
My current desktop setup. The issue of the Xbox Series X's heat output came up during an early preview program held by Microsoft last month. Now that I've had my hands on the system I'm pleased to report that while it is quite warm, my hands have not burnt off of my wrists. There's a strong heat coming from the system's vents, but nothing I'd consider worrisome. With my current setup, it functions as a convenient finger warmer, which is nice as the winter rolls in. What's important is the fan is very quiet, the vapor chamber cooling does its job, and the console has yet to explode. The Xbox Series X is easier to use. And faster, too.Harnessing all of this extra power, Microsoft has implemented a number of improvements and features that wouldn't be possible on older Xbox One consoles. The fabled "Quick Resume" feature, which allows players to hop between games quickly by creating save states that persist even if the system is completely removed from power is a game-changer, literally and figuratively. The ease at which you can switch between games that utilize the feature is unprecedented in a game console. I can be in the middle of playing Ori and the Will of the Wisps, hit the home button on the Xbox Series X controller, start up Dirt 5, realize I don't like Dirt 5 and quickly switch back to Ori, picking up exactly where I left off. I've been juggling Lego Worlds, Forza Horizon 4, Yakuza: Like A Dragon, Bright Memory, and Ori and the Will of the Wisps. That's pretty cool. Even cooler are the incredible loading times made possible by the Xbox Series X's "Velocity Architecture." More than just a speedy custom SSD drive, the Velocity Architecture is a combination of hardware and software innovation that changes the way the Xbox Series X accesses and decompresses information. Basically, the system's data output is fast, its channels wide, and delivery methods customizable enough that developers can make games load very quickly.
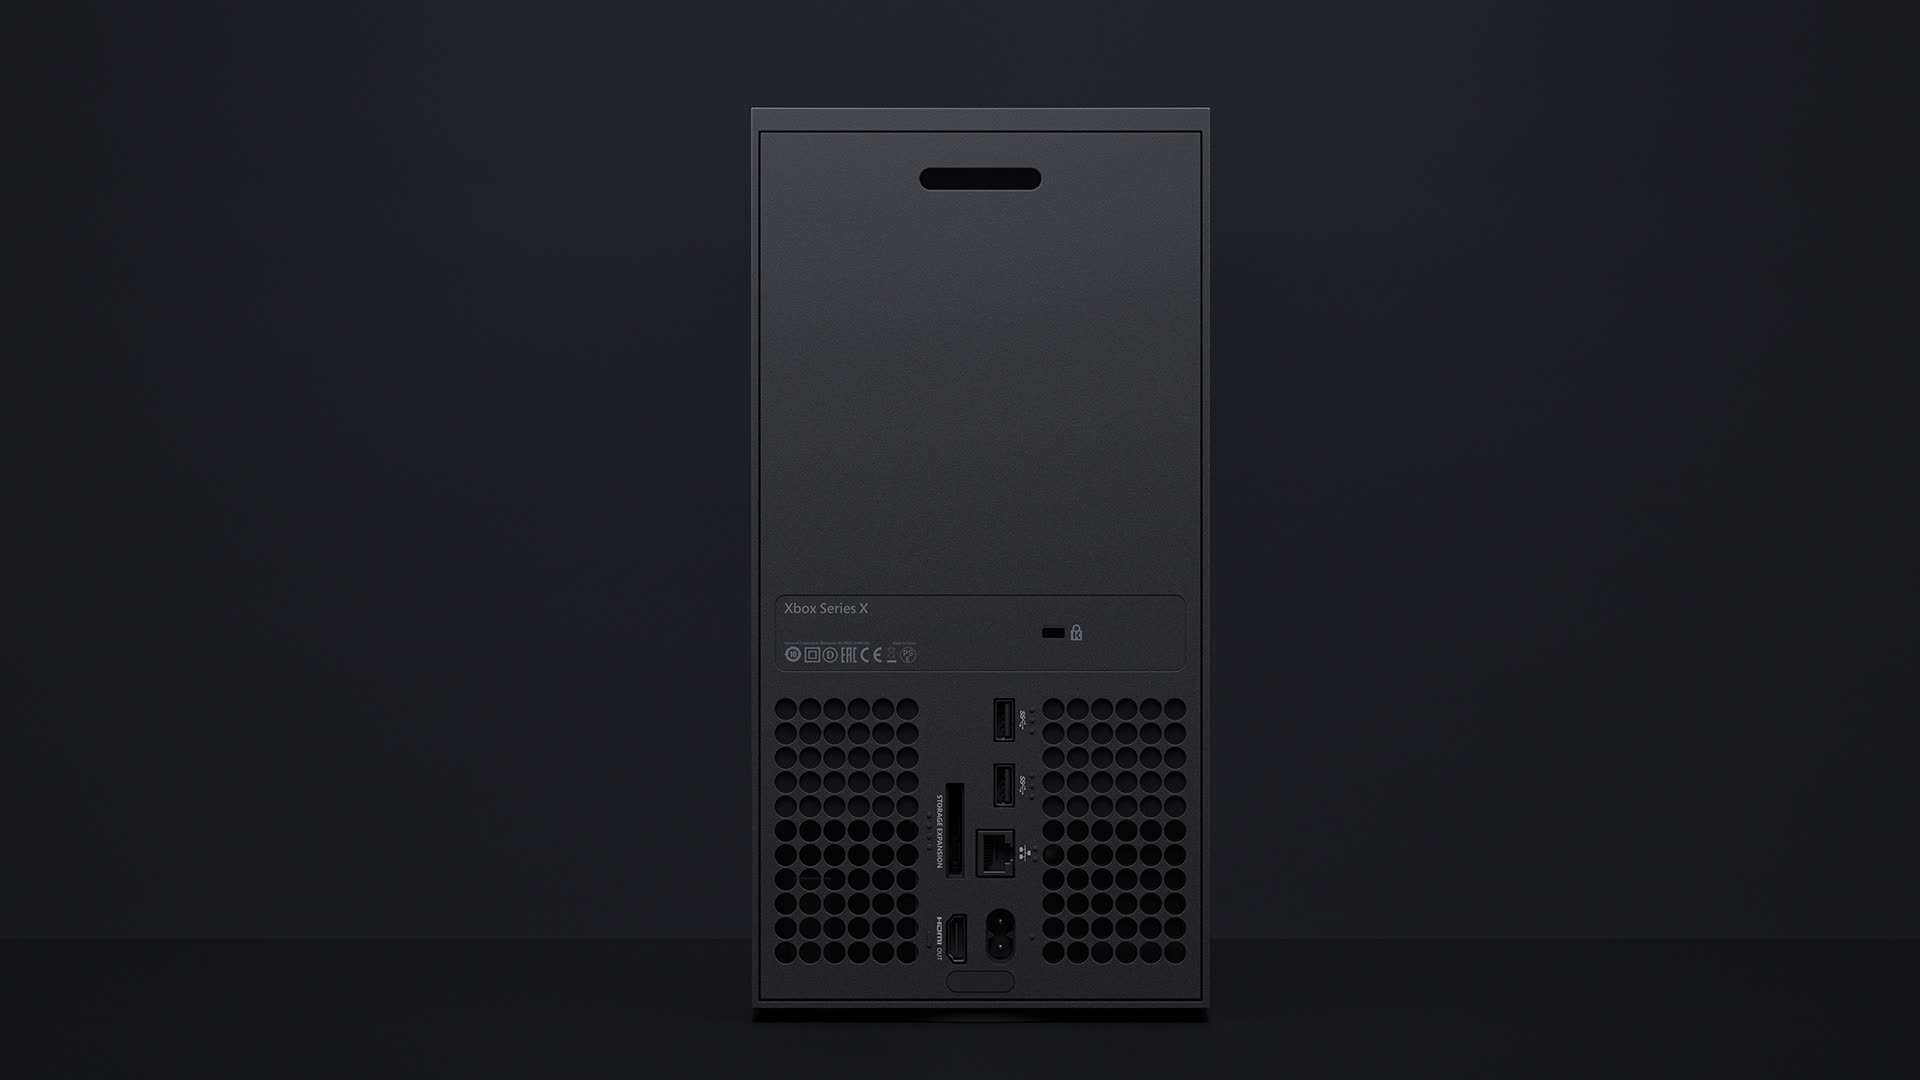
The back side of the Series X, complete with fancy SSD expansion port for upgrading storage. The Xbox Series X/S enhanced version of Forza Horizon 4 is the perfect example of the benefit of the Velocity Architecture. On the Xbox One X, where I've put dozens of hours into exploring the game's vast open world, it takes 83 seconds to go from hitting start after the menu screens to gameplay. It only takes 27 seconds on the Xbox Series X. That's a massive difference. On top of that, fast travel in the game happens in just a few seconds, and swapping between expansions, normally a 30 to 40 second affair, only takes 15. Every aspect of the game that involves loading data into memory, from rendering terrain to swapping out cars, is vastly accelerated. Same with Yakuza: Like a Dragon, the turn-based RPG spinoff launching with the Xbox Series X console. From selecting a save game to starting gameplay on the Xbox One X takes 30 seconds. On the Xbox Series X? Five seconds. How does that compare to the PlayStation 5, which also boasts spectacularly speedy SSD drives? Here’s a brief test, but know both systems load next-gen games at ludicrous speeds while giving older games a little push. Small changes to the controller, bigger changes to old gamesSpeed is the Xbox Series X's greatest and most noticeable improvement over the previous generation of Xbox consoles. Not everyone cares about the more accurate shadows, reflections, and lighting that comes with ray-tracing support. Not everybody can tell the difference between 4K and 1080p resolution. 3D spatial sound is great, but not a feature that makes or breaks a console. No, the Xbox Series X is all about that speed. When I try to play a game on the Xbox One X having played its Xbox Series X enhanced counterpart, I get testy and annoyed. If you put a controller in my hands without showing me which console I was playing, my main means of discerning which was the Series X would be the loading times and smoothness of the menus.
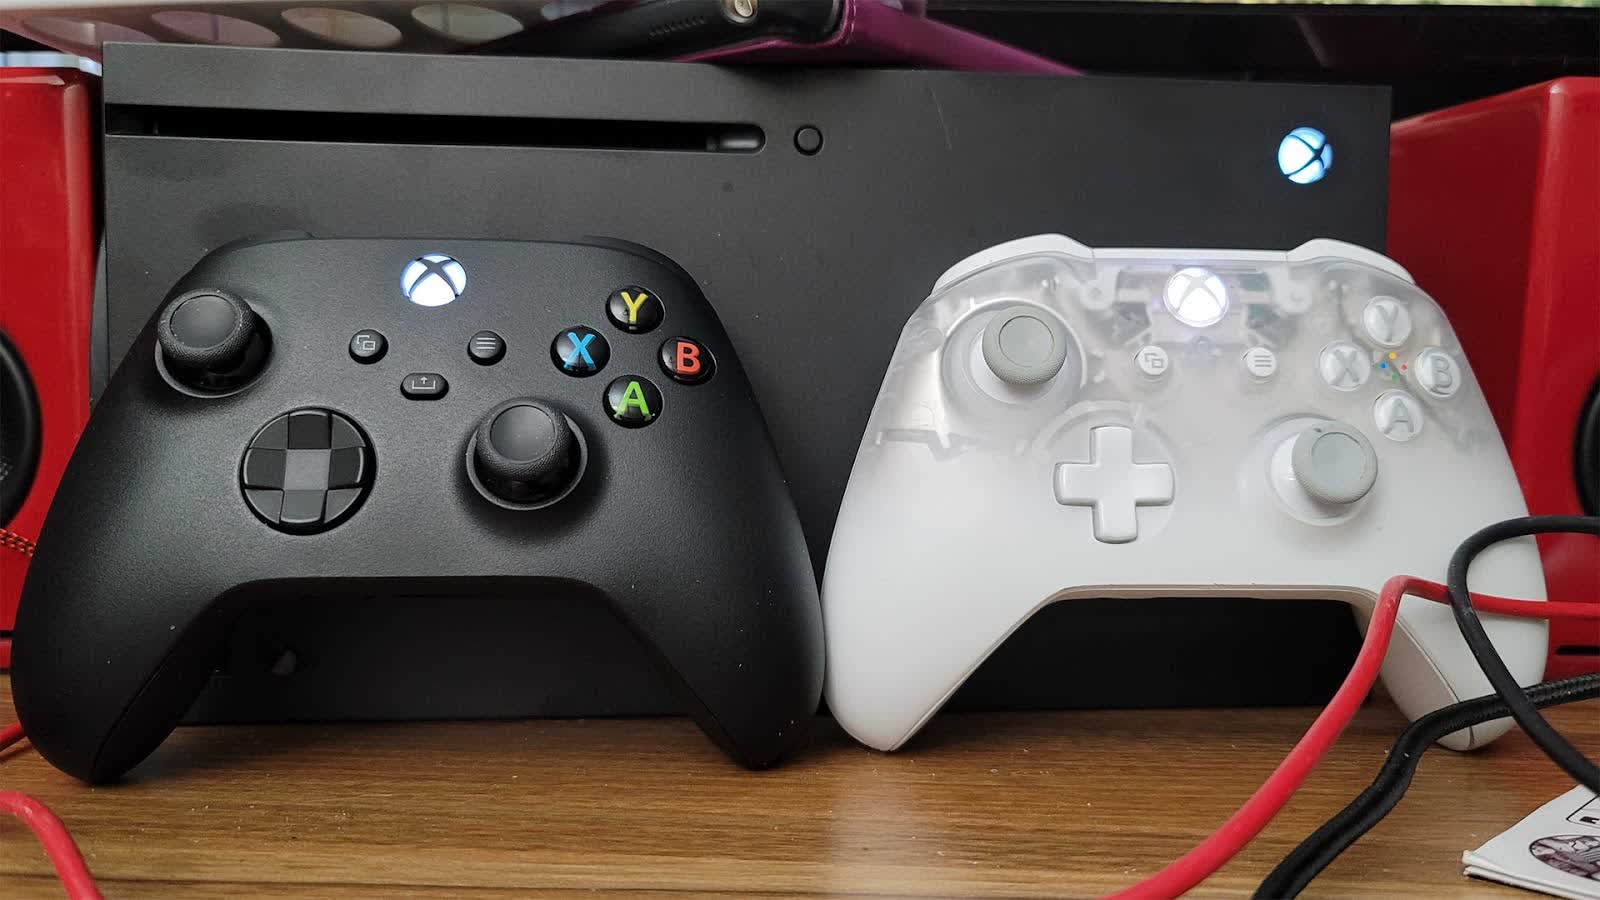
Xbox Controllers. It certainly wouldn't be the controller. Though the Xbox Series X controller sports a new design along the top, a flush home button, the new share button, and a new disk-shaped directional pad, it functions and feels just like a standard Xbox One controller. There are no fancy haptics, like in the PlayStation 5's DualSense controller. There's no built-in mic. It sports the same expansion port on the bottom, in case anyone wants to plug in an accessory of some kind. Playing with the Xbox Series X controller feels no different than playing with my older Xbox One. In fact, I can sync my Xbox One controller to the Series X and play that way. Between the similar controllers and the two consoles using the exact same dashboard, I spent much of the past week and a half trying to figure out which Xbox I was using with which controller. I am looking forward to retiring my Xbox One X to the kids' room or bedroom and ending this confusion once and for all. That'll happen as soon as I no longer have to make comparisons between the two consoles. The Series X is clearly the superior machine, and there is nothing I want to do on the Xbox One (screw you, Kinect games) I can't do on the newer console. The familiarity of the Xbox Series X is a comfort, really. I do miss the feeling of adventure and discovery that comes with exploring completely new hardware and software, but there's something cool about coming into a new bit of technology with a working knowledge. It's the same feeling when I get a new iPhone. I know my way around, so let's see what it can do. As it turns out, a lot of what the Xbox Series X can do is games I already enjoy, only faster and prettier. Of the 31 or so games optimized for Xbox Series X/S at launch, at least 20 of them are games I've already played and enjoyed on the Xbox One, now optimized so they load faster, use higher resolution textures, or implement new graphical flourishes utilizing the system's increased power. What better way to demonstrate the hardware's capabilities than games players are already familiar with? The downside to the Xbox Series X/S enhanced program is similar to what Xbox One X users had to go through when that incremental upgrade launched in 2017. There's going to be a lot of waiting for patches and updates to get older games to take advantage of all of this power. Unpatched games run fine on the Xbox Series X, so developers will have to determine if they can spare the manpower to give their games a bump. Remember the Super Duper Graphics Pack for Minecraft, announced at E3 2017? It was an Xbox One X enhancement patch that never showed up, officially canceled last year for being too difficult to implement. There's a chance there'll be some Xbox Series X enhancement patches that never see the light of day. No big Xbox Series X launch gameThere'll be plenty of older games to play come launch day, but there won't be any big new games on the Xbox Series X. The closest thing to a system-seller game the Series X had, Halo Infinite, was delayed until 2021 in August. Without a shiny new entry in the sci-fi shooter series ready, Microsoft is banking on folks getting excited about big-name multi-platform fare like Assassin's Creed Valhalla or the next-gen timed-exclusive Yakuza: Like A Dragon, the PlayStation 5 version of which won't be out until March. And a large batch of older games upgraded with higher resolutions, faster framerates, enhanced lighting effects, and faster loading times. Even a relatively new game like Gears Tactics, which had already been released on PC, is coming not just to the Series X and S but to the Xbox One. The next-gen version will just run better.
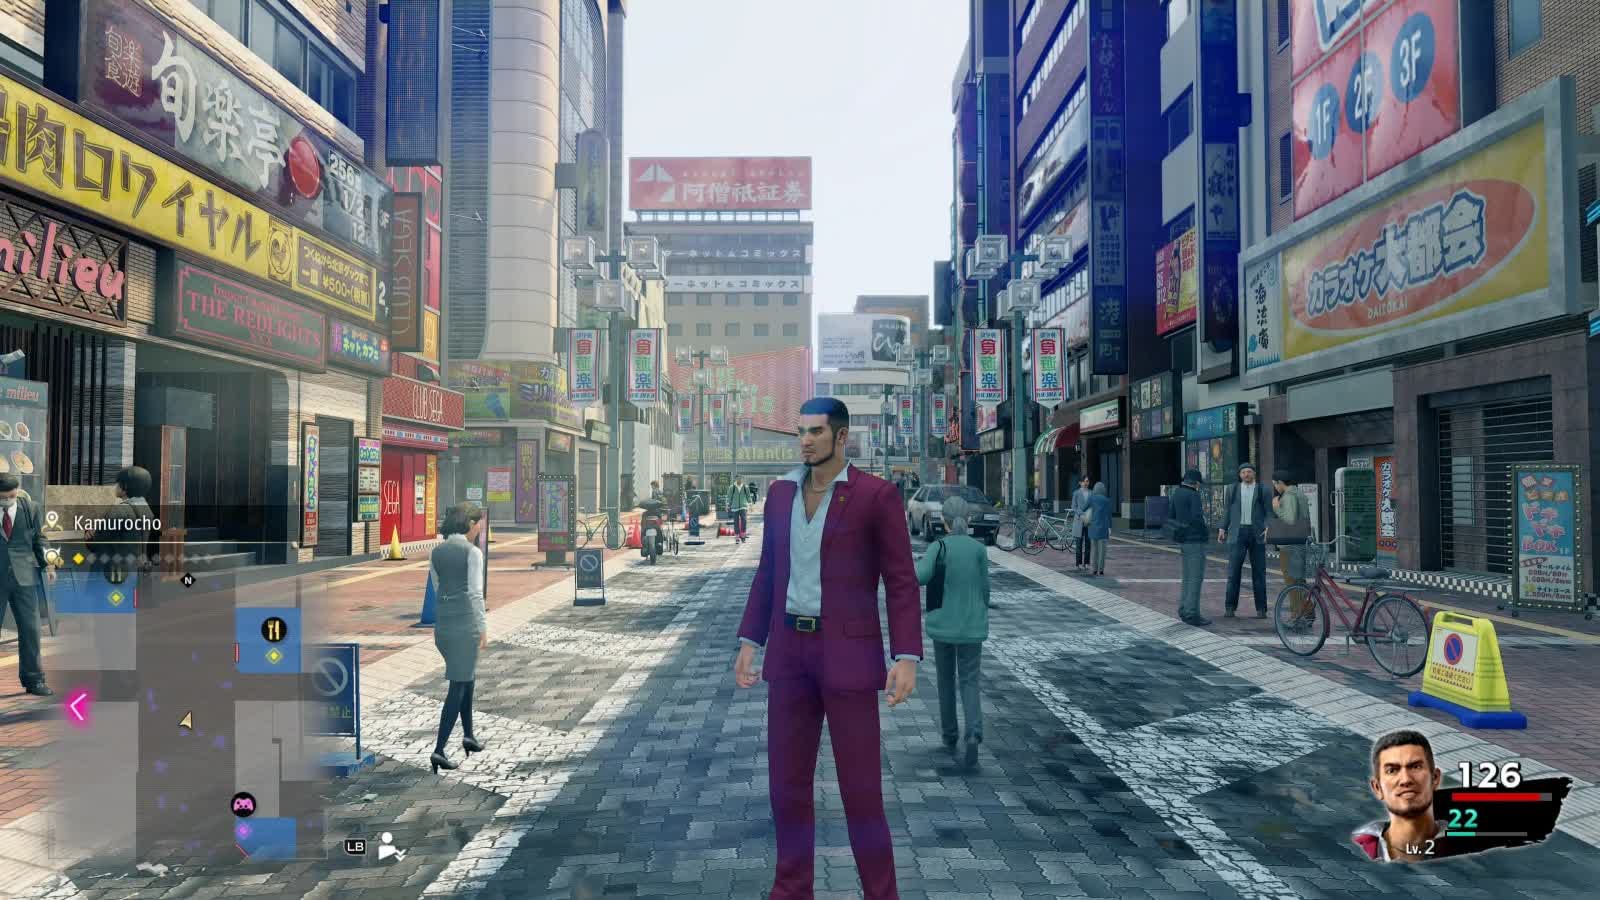
Yakuza: Like A Dragon running in high resolution mode on the Xbox Series X. Microsoft is partially selling Series X and S owners on the promise of eventually getting a new Fable, a new Forza, and new games from Rare, Obsidian and more of the company's recently-expanded roster of studios. All of those are a long way off. The bottom line on the Xbox Series XAll of this cross-platform play and sharing of the older Xboxes' gaming libraries support my initial impressions. The Xbox Series X is not a traditional next-generation system. In fact, it challenges the idea of console generations as we know them. Continuing the model it established with the Xbox One X and One S, Microsoft is evolving the Xbox One rather than replacing it entirely. And why not? Why commit an entire generation of games to eventual obsolescence or barrage the nostalgic with constant paid reissues (*cough Nintendo cough*)? Why not smoothly and seamlessly carry on the legacy instead? No one who buys an Xbox Series X will regret setting aside or trading in their Xbox One. In effect, it lives on in a newer, much more impressive form. Oh, what about the Xbox Series S?A Note About The Xbox Series S From Kotaku EiC Stephen Totilo: One of the most unusual things about the start of this new console generation is that one party, Microsoft, is launching two new consoles at once. For the Xbox, we've focused our review primarily on Microsoft's more high-profile device, the powerful $500 Xbox Series X, but we've also been playing with the Series S. Mike's had the X in Georgia. I've had the S in New York. The $300 Series S is notably weaker than the X and has less storage, granting me access to less than 400GB compared to the 800GB in the X. That's somewhat limited the number of games I've been able to fit onto my S and made it less likely that I'll just be blithely downloading new games that get added to the Xbox Game Pass subscription service when I see them available. But aside from that small storage, I have no medium-term complaints.
As with the X, the S feels like I've replaced my Xbox One the way I occasionally replace my iPhone with a newer model. My games—or at least the ability to download them—are all right there, as are my settings, all good to go. And the Series S seems to have enough power to give me the ability to do the same Quick Resume juggle as Mike and experience a lot of the same loading speed improvements he's experiencing. There's a catch, though hopefully tied to standard rush that comes with launch. While Quick Resume was working great for me about a week ago, Microsoft sent reviewers a note on Thursday saying that an issue had been discovered with some games that are being upgraded to Series S and X and that the company would disable Quick Resume support for those games. That left me unable to do Quick Resume with Gears 5 and Forza Horizon 4, but still able to do it with the new Assassin's Creed, the recent Tony Hawk remaster and Batman Arkham Knight. Microsoft PR told me that this is a software issue that will be addressed in patches and title updates through and after launch. Confusingly, Forza Horizon 4’s Quick Resume still worked on a colleague's Xbox Series X, but Microsoft PR repeatedly emphasized this as a software issue when I asked if Series S just wasn't as good as the X at Quick Resume. I'll keep tracking this, of course.
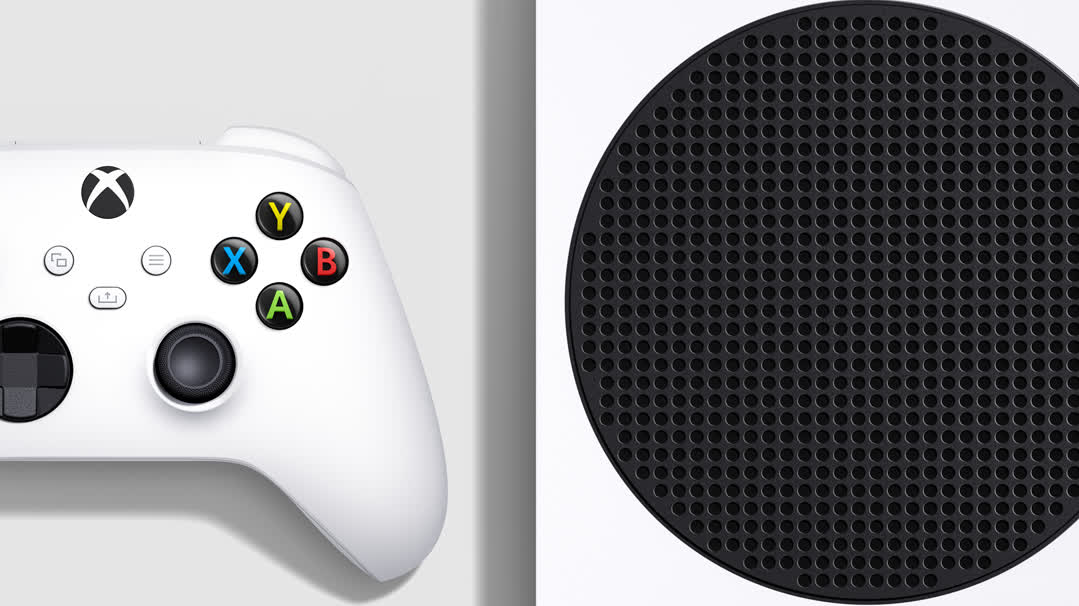
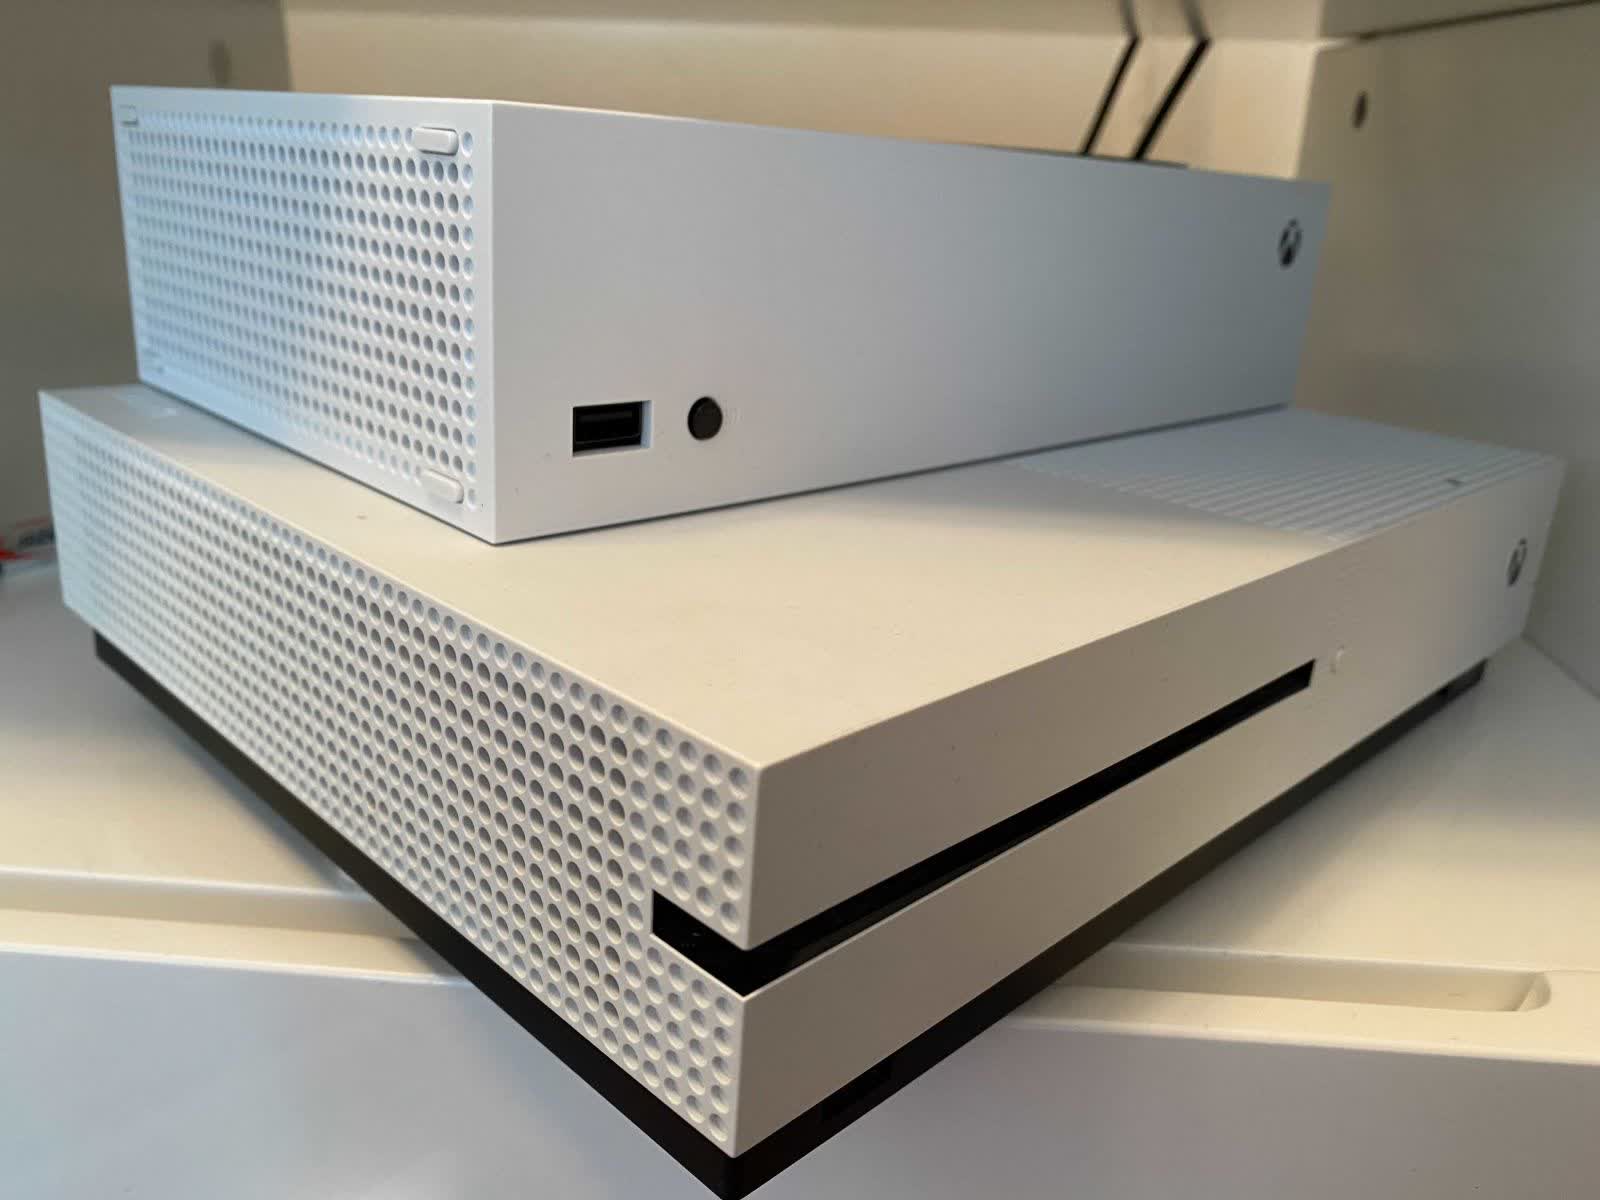
The Xbox Series X sitting atop the much larger Xbox One S. Aside from the hopefully temporary issue with Quick Resume, the S is performing quite nicely. It runs some of my Xbox One games at much better framerates, just not at the 4K resolutions that Mike is probably seeing. As someone who preferred putting current-gen games in a high-framerate mode instead of a high-resolution mode, I don't mind the trade-off. It feels like a more powerful machine, and it still gives me a lot of the Xbox experience, including access to Game Pass, that I enjoy. Of course, I don't know what I'm missing, since I don't have the X and can't see through Mike's window to spy on his X all the way from New York. But, hey, the weaker S spec is the trade-off for getting a console that costs just $300 (full disclosure: Microsoft sent us these X and S units, as is standard for console reviews). It's also the trade-off for having a console that's shockingly small: The Series S is the size of a thick paperback book. And then there's the long-term. The existence of the S might hold back the specs of future Xbox Series games or it might require developers to eventually leave the S behind. But given that Microsoft says that even the Xbox One is still going to be supported for some time, the S's technical inferiority to the X probably won't matter for a long time to come. Right now, the Series S is an impressive little machine, and one I'll continue to update readers about as I use it more. |
| How to Pin Control Center Modules to the Menu Bar on Mac Posted: 12 Nov 2020 12:05 PM PST  The Control Center on Mac consolidates all the system controls in one neat drop-down menu. But there are some controls like "Wi-Fi," "Battery," and "Sound" outputs that you still might want to access from the menu bar. Mac users running macOS Big Sur and newer have both options. They can keep system controls in the Control Center and they add any control directly to the menu bar. This includes new Control Center modules like "Now Playing," "Display," "Accessibility Controls," "Fast User Switching," and more. RELATED: What’s New in macOS 11.0 Big Sur, Arriving November 12, 2020 There are two ways to add and remove controls to the menu bar. You can simply drag and drop a control or you can use "System Preferences." The first option is far more intuitive. To get started, click the "Control Center" button from the menu bar to see all modules.
Now, click and hold a module to pick it up. Simply drag the control over to the menu bar and place it where you want. Then, let go of the cursor to pin it to the menu bar.
You can rearrange menu bar icons at any time. Press and hold the "Command" key on your keyboard and then drag and drop icons to rearrange them. RELATED: How to Rearrange and Remove Your Mac’s Menu Bar Icons Once a control (or as macOS refers to it, a module) is added to the menu bar, you can just click the icon to expand it and see all the options.
Removing a module from the menu bar is also quite simple. Hold the "Command" key on your keyboard and drag the control icon down towards the desktop. In a second, you'll see a little "x" icon next to it. Simply let go to remove the icon from the menu bar.
Alternatively, you can also use the "System Preferences" menu to add or remove modules to the menu bar. Click the "Apple" icon in the top-left corner and then choose the "System Preferences" option.
Now, select to the "Dock & Menu Bar" option.
Here you will see all controls listed in the sidebar. Choose a control (like "Wi-Fi") and check the "Show in Menu Bar" option to add the control to the menu bar. Uncheck the option to remove the control from the menu bar.
And yes, this works for the additional controls that are not available directly in the Control Center. You can go to the "Other Modules" section and enable the "Show in Menu Bar" option for "Accessibility Shortcuts," "Battery," and "Fast User Switching" modules to directly access them from the menu bar.
|
| How to Launch Chrome with a Keyboard Shortcut in Windows 10 Posted: 12 Nov 2020 10:02 AM PST
Windows 10 is packed full of keyboard shortcuts, but you can also create your own keyboard shortcuts to launch the applications they are assigned to. Here's how to create one for launching Google Chrome on Windows 10. You'll need Google Chrome installed on your PC to do this. You'll also need to create a desktop shortcut for Chrome if you don't already have one. To do this, open the "Start" menu by clicking the "Start" button in the bottom-left corner of your desktop.
Next, scroll down the app list until you find "Google Chrome" and then drag and drop the icon to the desktop. A shortcut will be created.
Right-click the Google Chrome desktop shortcut and select "Properties."
Google Chrome's "Properties" window will appear. In the "Shortcut" tab, you'll notice a "Shortcut Key" option with "None" written in its text box. This means that there is currently no shortcut key assigned to this application.
Click the text box and press the key on your keyboard that you would like to assign as the shortcut key to Google Chrome. Ctrl+Alt will be added to the beginning by default. So, if you want to make Ctrl+Alt+C your shortcut key for launching Google Chrome, just press "C".
If a Ctrl+Alt+<key> combination already exists (like Ctrl+Alt+Delete or Ctrl+Alt+Tab), you will not be able to assign that combination to this application. When ready, apply the changes by clicking the "Apply" button in the bottom-right corner of the window. Next, click "OK."
The keyboard shortcut is now applied. Press your chosen keyboard shortcut and Windows will launch Google Chrome. To undo this change, either delete the desktop shortcut you created or open its Properties window and remove the shortcut from the "Shortcut key" box. RELATED: Chrome Shortcuts You Should Know |
| You are subscribed to email updates from My Blog. To stop receiving these emails, you may unsubscribe now. | Email delivery powered by Google |
| Google, 1600 Amphitheatre Parkway, Mountain View, CA 94043, United States | |

0 nhận xét:
Đăng nhận xét