How To Get Android Notifications On Windows 10 |
- How To Get Android Notifications On Windows 10
- How to Block Facebook Users From Messaging You on Instagram
- How to Change Your Team Logo in Microsoft Teams
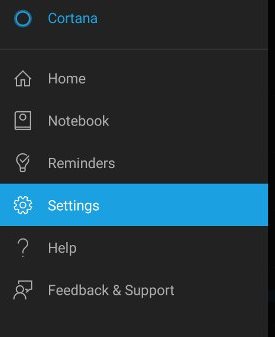
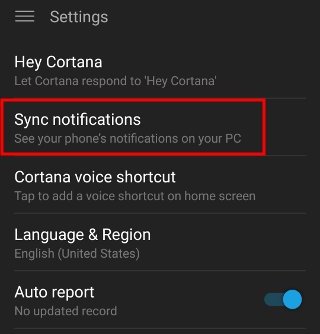
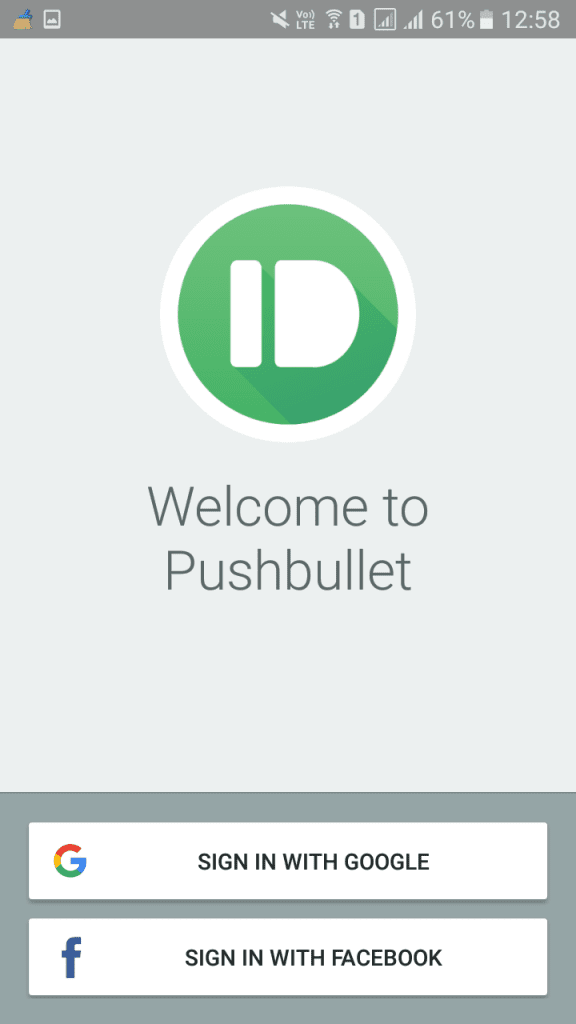
| How To Get Android Notifications On Windows 10 Posted: 16 Nov 2020 09:44 PM PST Let's admit, there are times when we feel difficult to manage both our smartphone and computer. If you are running an online business, then you are more likely to be focused on a computer all day instead of your smartphone. Although managing smartphones is not a difficult thing, still users search for productive ways to manage their phones while working on a computer. So, if you are also searching for a more productive way to manage your Android from a desktop computer, then this article might help you. In this article, we are going to share the two best methods that would help you to mirror Android's notifications on Windows 10 PC. By mirroring Android's notifications to the PC, you can manage SMS, Calls, etc right from the computer screen. So, let's explore the two best methods to Get Android Notifications on Windows 10 computer. Also Read: How to Share WiFi Password On Android Get Android Notifications On Windows 10The method is quite simple and easy and you just need to do synchronization of Microsoft account between the android Cortana app and your Windows 10 PC to get the notifications on PC. Step 1. First of all, download and install Cortana on your android phone. Step 2. After downloading the app you need to launch it and skip the initial guide. Step 3. Now you need to sign in with the Microsoft account that you are using on your PC. Step 4. Now there you need to tap on the "Hamburger" icon to open the menu and there go to "Settings". Step 5. On the next page, tap on the Sync Notifications. This will show you all sync settings. Step 6. Now you need to enable all available app notification options. Now after you are done on android, you need to enable Cortana on your Windows 10 PC and when you will do that, you will find your Device in the notification panel. That's it! You are done. now you will get all you android notifications right on your PC. 2. Using PushbulletFor those who don't know, Pushbullet is an Android app that's meant to mirror your phone notifications on the PC. Although it won't mirror every app notification, it can help you make or receive calls right from the computer screen. So, in this method, we are going to use Pushbullet to get Android's notification on Windows computer. Step 1. First of all, download & install Pushbullet on your Android device. Step 2. Once downloaded, click on this link and install the Pushbullet extension in your Chrome browser. Step 3. Next, open the Pushbullet Android app and sign in with the Google Account. Step 4. You need to sign up with the same Google Account on Pushbullet's chrome extension. Once done, grant the permissions. Step 5. Once done, you will now see a screen like below. From this page, you can manage your call logs and SMS. Step 6. You will also get a notification like these on your computer during the incoming call. That's it, you are done! This is how you can use Pushbullet to get Android Notification on Windows 10. So the above discussion is all about how to get Android notifications on Windows 10. I hope this article helped you! Please share it with your friends also. If you know any other methods to receive Android notification on PC, let us know in the comment box below. |
| How to Block Facebook Users From Messaging You on Instagram Posted: 16 Nov 2020 07:52 PM PST
Facebook has merged Messenger and Instagram DMs. This means anyone from Facebook can slide into your Instagram DMs. If you prefer keeping your Facebook and Instagram profiles separate, this can be a cause for concern. Thankfully, Instagram allows you to easily cut off this link. Open the Instagram app on your Android phone or iPhone. Navigate to your profile tab by tapping your display picture found in the bottom-right corner of the app.
Tap the hamburger menu button in the top-right corner. In the side menu, select "Settings."
Go to Privacy > Messages.
Here, you have a few ways to customize who from Facebook can text you on Instagram. To prevent your Facebook friends or anyone else you've ever chatted with on Messenger from reaching out to you on Instagram, tap the second setting on the list.
The default "Chats" option lets any of your Facebook friends or acquaintances to clutter your Instagram inbox. If you want to block your Facebook friends entirely, check "Don't Receive Requests." Selecting the "Message Requests" sends texts from Facebook friends to your Instagram's DM request list.
Friends of your friends on Facebook can also get in touch with you on Instagram from Messenger. To put an end to this, return to the "Message Controls" page and head into "Friends of Friends on Facebook."
Choose "Don't Receive Requests" to shut them out.
Lastly, the "Others on Facebook" setting enables you to ban strangers from Facebook Messenger to message you on Instagram.
It's worth noting that Facebook Messenger users can only ping your Instagram inbox if you have opted into the merger. These message controls come in handy especially if you want to try the new messaging features and not let Messenger profiles bother you on Instagram. Unfortunately, there's no option to roll back to the old version of Instagram DMs. Similarly, you can now also message a Facebook friend from Instagram. |
| How to Change Your Team Logo in Microsoft Teams Posted: 16 Nov 2020 10:44 AM PST
Creating and joining a team in Microsoft Teams is easy. Visually identifying a team from a long list of teams, on the other hand, can be more difficult. Give your teams a visual identity by adding a unique logo to each one. It's quite normal to have a list of teams in Microsoft Teams, each of which is represented by an icon with the initials of the team name in it.
The more teams you're a member of, the more difficult it is to identify a team at a glance, especially if you're a member of multiple teams that have the same initials. The best way to easily identify a team is to give it a unique logo. This image will show up in the list of teams and in the team itself. Before we begin, know that you'll need to be the owner of the team before you can change its icon. To change your team logo, open Microsoft Teams, click the three-dot menu button next to the team name, then select "Manage Team."
Navigate to the "Settings" tab, expand the "Team Picture" section, and click the "Change Picture" button.
In the panel that opens, select the "Upload Picture" button.
A file dialogue will appear for you to locate the image you want to use for your team. Select the photo you want, then click the "Save" button.
Close the panel. Your image will now be visible in the sidebar and in the team itself.
If you want to change the image again in the future, just repeat the process. |
| You are subscribed to email updates from My Blog. To stop receiving these emails, you may unsubscribe now. | Email delivery powered by Google |
| Google, 1600 Amphitheatre Parkway, Mountain View, CA 94043, United States | |


0 nhận xét:
Đăng nhận xét