How to Use vCalendar Files in Outlook |
- How to Use vCalendar Files in Outlook
- How to Change Your Android Phone’s Name
- How to Get Free Spotify Premium for 6 Months
- How to Create Shortcut to Launch Apps In Split Screen Mode
- How to Stream Every Version of ‘How the Grinch Stole Christmas’
- What’s the Difference Between One UI and Tizen?
| How to Use vCalendar Files in Outlook Posted: 18 Dec 2020 08:02 AM PST
Microsoft Outlook uses vCalendar files to exchange information about meetings and appointments with others in your home or organization. With vCalendar files, you can easily schedule appointments with others even if they're not using Outlook as their primary calendar. What Is a VCS File?A vCalendar file, which has the .vcs file extension, lets you exchange calendar events with other people. You can save an Outlook calendar event inside a VCS file and send it to someone to share those event details—even if the recipient is outside your organization. Some other email applications support VCS files, too, so this also works to exchange files with people who don't use Outlook. How to Create vCalendar Files |
| How to Change Your Android Phone’s Name Posted: 18 Dec 2020 06:31 AM PST
Every Android phone and tablet has a generic name that matches the model (Pixel 5, Galaxy S20, etc). This name occasionally appears if you connect other devices to your device. A simple thing you can do to avoid confusion is to change your device's name. A common situation in which your device's name may come into play is Bluetooth connections. Say you're connecting your phone to your computer, and when you scan for nearby devices, your Android's name appears. If multiple people in your house have the same device, this can be confusing. It's quick and easy to change your device's name. First, swipe down from the top of the screen (once or twice depending on your phone or tablet's manufacturer) to open the notification shade, then tap the gear icon to open the Settings menu.
Next, scroll down and select "About Phone." Depending on your device, you may have to go to "System" before you see the "About Phone" section.
Find the "Device Name" option and simply tap it.
Alternatively, look for an edit button.
Lastly, type in the new name for your Android phone or tablet and tap "OK" or "Save."
It's as simple as that. Device names don't come up in many situations, but it can still be useful to give yours a more specific name. Hopefully, this will help clear up any confusion when connecting devices.
|
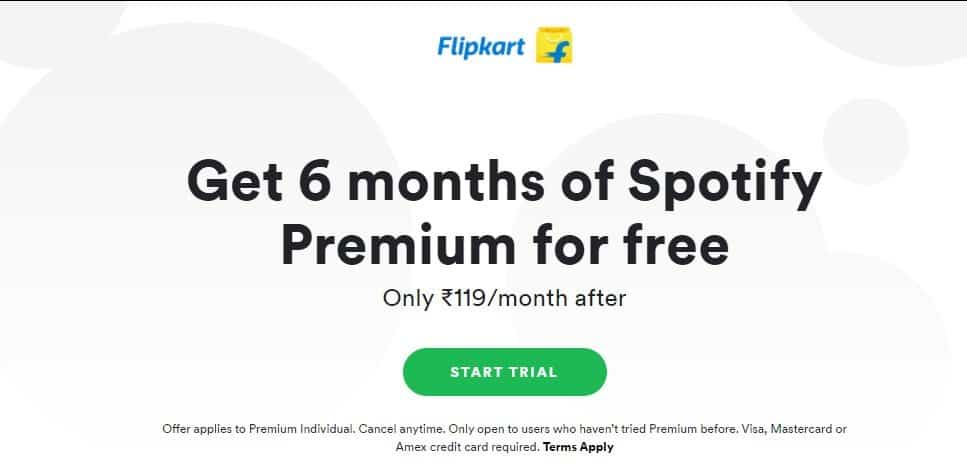
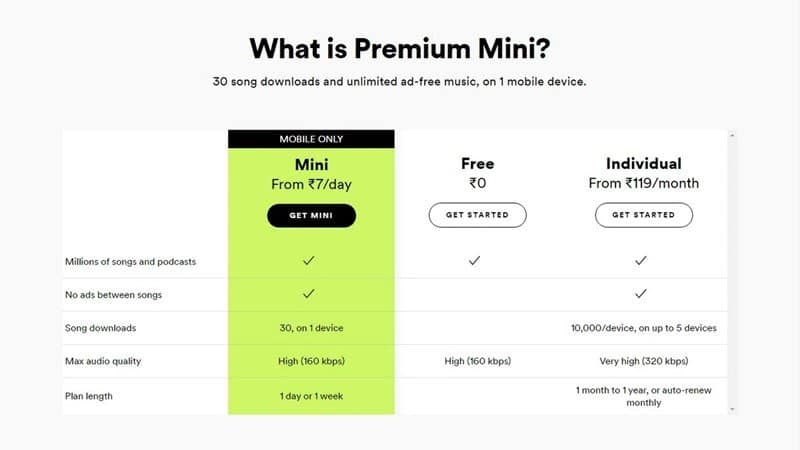
| How to Get Free Spotify Premium for 6 Months Posted: 17 Dec 2020 10:36 PM PST Android has plenty of apps when it comes to music streaming. Just search for music on the Play Store; you will find countless apps over there. However, if we have to pick anyone from the crowd, we would pick Spotify. Spotify is one of the best and most popular music streaming app available in India. The app allows users to stream endless hours of music. Also, it allows you to create and share your own music with others. The music quality of Spotify Premium is also pretty good, and it takes your music listening experience to the next level. However, to get the best music quality, one needs to purchase Spotify's premium version. Also Read: 10 Best VPNs For Spotify – Unblock & Access Spotify How to Get Free Spotify Premium for 6 Months!For Indian users, Spotify has introduced a few new plans like Rs. 7 for one day, R*/[`. 25 for one week, etc. Although the premium plans look affordable, not everyone has the budget to purchase a premium music streaming service. For those users, Spotify is now offering six months of Spotify premium for free to Indian users. What is Spotify Premium 6 Month Offer?
Well, Spotify has come up with Flipkart to reach more audiences in India. The company plans to offer a premium account to those users who have purchased selected products on Flipkart. The company is offering six months of free trial to selected users only. If you are lucky, then you will receive an SMS with a link to redeem the coupon code along with the subscription period. Alternatively, you can check the Flipkart app's notification message to get the coupon code. However, only selected users will receive the coupon code to avail 6 months of Spotify premium. How To Redeem the Coupon Code?You can easily redeem the coupon code if you have received the Flipkart app or coupon code SMS. Once you have the coupon code, follow the steps given below.
Note: You need to have Visa, Mastercard, or Amex credit card to avail the offer. As of now, no debit card is supported. That's it! You are done. This is how you can get six months of free Spotify Premium trial. Other Ways to Get Spotify Premium for Free?
If you haven't received the coupon code, you need to rely on other ways to get Spotify Premium for free. We have shared a detailed guide on how to get Spotify Premium for free on Android. Make sure to check out that article. So, this article is all about how to get free 6 months of Spotify premium membership. I hope this article helped you! Please share it with your friends also. If you have any doubts related to this, let us know in the comment box below. |
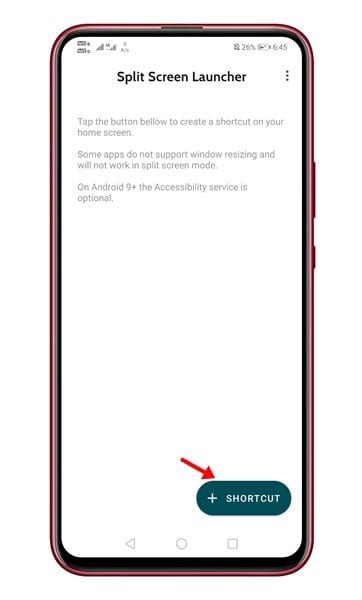
| How to Create Shortcut to Launch Apps In Split Screen Mode Posted: 17 Dec 2020 11:56 AM PST Android is definitely the best choice when it comes to multitasking. It's an open-source operating system that has a variety of apps for multitasking. Also, things have changed considerably after the arrival of Android 7.0, which introduced a split-screen mode. If your smartphone is running on Android 7.0 or above, it might have the Split Screen feature. The Splitscreen view is one of Android's most useful features, but it's never used at its full potential. It's because, on Android, opening apps in a split-screen view is harder. It's actually much easy to swipe between apps and multitask rather than opening apps in a split-screen view. However, things can become easy if you can create a shortcut to open two apps in a split-screen view. There's an app that makes this thing possible known as Split Screen Launcher. Also Read: How To Share Your Android Screen With Other Android How to Create Shortcut to Launch Apps In Split Screen ModeSplit Screen Launcher is an Android app that creates app shortcuts on the home screen to launch two apps directly in a split-screen mode. Here's a detailed guide on how to use the Split Screen Launcher app on an Android smartphone. Step 1. First of all, download & install Split Screen Launcher on your Android smartphone. Step 2. Once downloaded, open the app and tap on the (+ Shortcut) button on the screen's bottom.
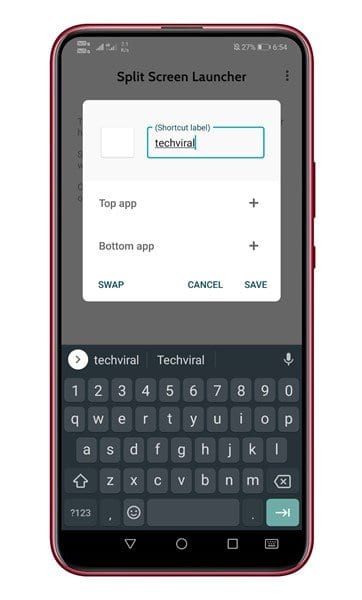
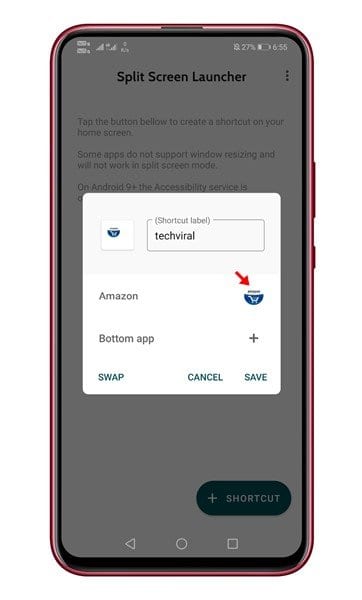
Step 3. Now enter the shortcut name. The shortcut name will be visible on the home screen.
Step 4. Now tap on the (+) sign beside 'Top App' and select the app that you want to place at the top of the split-screen mode.
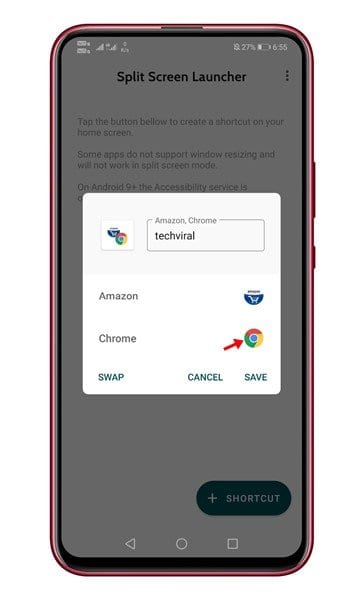
Step 5. Next, tap on the (+) sign beside the 'Bottom app' and select the app you want to place at the bottom of the screen.
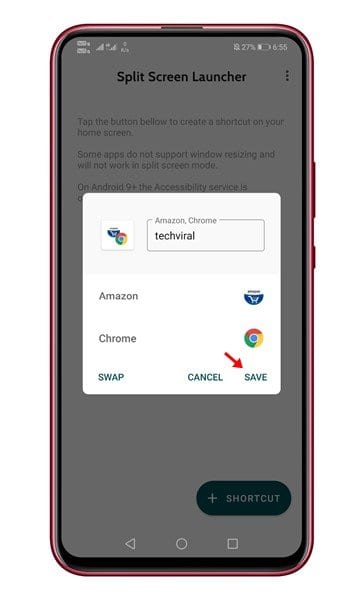
Step 6. Once done, tap on the 'Save' button.
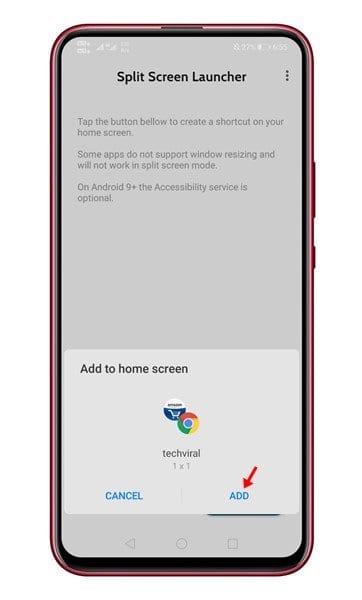
Step 7. Now you will see a popup asking you to add the shortcut to the home screen. Tap on the 'Add' button.
Step 8. You will find the new shortcut on the home screen. Simply tap on the shortcut to open the apps in split-screen view.
That's it! You are done. This is how you can launch Split Screen Launcher to create app shortcuts on the home screen.
This article is about creating shortcuts on the home screen to launch two apps directly in the split-screen mode. I hope this article helped you! Please share it with your friends also. If you have any doubt related to this, let us know in the comment box below. |
| How to Stream Every Version of ‘How the Grinch Stole Christmas’ Posted: 17 Dec 2020 10:19 AM PST  Dr. Seuss's beloved 1957 children's book How the Grinch Stole Christmas! has become one of the essential stories of the Christmas season. It's been adapted multiple times in both animation and live-action. Here's how you can stream every version of How the Grinch Stole Christmas! The story of the grumpy, Christmas-hating creature who learns the true meaning of the season after attempting to sabotage the holiday in wholesome Whoville is a favorite of multiple generations of kids and adults. Whether you prefer the classic animated TV special or the most recent staged musical production, there's a Grinch for you. How the Grinch Stole Christmas! (1966)Directed by legendary Looney Tunes animator Chuck Jones and starring horror icon Boris Karloff as the voice of both the narrator and the Grinch himself, this CBS special has aired on TV every year since its premiere. It also introduced several important elements of the Grinch mythology, including the character's green-skinned appearance and his theme song, "You're a Mean One, Mr. Grinch." It was followed by the non-Christmas-themed sequels Halloween Is Grinch Night and The Grinch Grinches the Cat in the Hat. How the Grinch Stole Christmas! (along with Halloween Is Grinch Night and The Grinch Grinches the Cat in the Hat) is available for digital purchase ($8.99+) and rental ($3.99+) at Amazon, iTunes, Google Play, and other outlets. How the Grinch Stole Christmas (2000)The only comedy star with the right kind of intensity to take on the Grinch was Jim Carrey, who donned some mildly unsettling full-body prosthetics to play the character in Ron Howard's live-action adaptation. Howard channels a bit of Tim Burton in his creation of the rather psychedelic Whoville, expanding on Dr. Seuss's simple story in order to fill out a feature-length film. Whether you find it delightful or nightmarish, Carrey's version is certainly tough to forget. How the Grinch Stole Christmas is streaming on Netflix ($8.99+ per month) and is available for digital purchase ($8.99+) and rental ($3.99+) at Amazon, iTunes, Google Play, and other outlets. The Grinch (2018)Illumination, the animation studio behind the Despicable Me movies (as well as the previous Dr. Seuss adaptation The Lorax), created a feature-length animated version that expands the story in different ways than Ron Howard's film, giving it a lighter, friendlier tone. Benedict Cumberbatch brings a slightly more subdued approach to his performance as the Grinch, and the film's design sense is brighter and cuddlier than in previous versions. Audiences responded well, making The Grinch the highest-grossing holiday movie of all time. The Grinch is available for digital purchase ($8.99+) and rental ($3.99+) at Amazon, iTunes, Google Play, and other outlets. The Grinch Musical (2020)
The story of the Grinch was first adapted into a stage musical in 1994, and in December of 2020, NBC made it the network's latest "live" musical broadcast—although pandemic-related restrictions required it to be pre-taped without an in-person audience. Glee star Matthew Morrison plays the Grinch alongside Denis O'Hare and Booboo Stewart as different versions of the Grinch's dog Max. The production includes songs originally created for various versions of the story, including the 1966 special, the 2000 movie, and the stage musical (plus some up-to-date current-events jokes). The Grinch Musical is streaming on Hulu ($5.99+ per month after a seven-day trial) and Peacock (free with ads or $4.99+ per month or $49.99+ per year). |
| What’s the Difference Between One UI and Tizen? Posted: 17 Dec 2020 09:16 AM PST
If you use Samsung products, especially the company's smartwatches, two names you've probably seen are "Tizen" and "One UI." Together, they're responsible for Galaxy smartwatch software, but what's the difference? And why does your watch need both? Diving into the "About Watch" section of the Settings menu on your Galaxy watch will reveal version numbers for both One UI and Tizen. Each of these software layers is playing an important role. Let's take a look at what each one does. What Is Tizen?Tizen is similar to Android in that it's an open-source operating system based on Linux. The first version of Tizen was released in 2012, but it wasn't available on a true consumer device until the Samsung Gear 2 smartwatch in 2014. There are many similarities between Android and Tizen. Both operating systems receive firmware updates, can be used on a multitude of different device types, and are free for developers to build apps and experiences. Since Tizen is an open-source operating system, any manufacturer can use it for its devices. However, unlike Android, which is on devices by dozens of manufacturers, Tizen is primarily used by just one: Samsung. Samsung originally planned to use Tizen on smartphones and tablets. The company launched a handful of Tizen phones, but over time, that plan was abandoned, and the operating system (OS) is nearly exclusively used for Samsung's wearables and smart TVs. As an OS, Tizen is partially only as useful as the apps it can run. On a Samsung device with Tizen, apps can be downloaded from the Galaxy Apps store. Apps must be built specifically for Tizen to be available on Tizen devices. What Is One UI?One UI is Samsung's overlay that's responsible for the actual look of the software. On a Samsung Galaxy smartphone, One UI lives on top of Android, and on a Galaxy smartwatch, One UI lives on top of Tizen. If we think of Tizen or Android as a canvas, you can think of One UI as the paint. The operating system is responsible for the core functionality, while the overlay customizes how it all looks. The OS can exist without an overlay, but the overlay can't exist without an OS. One UI is Samsung's third major software overlay. Early Samsung Android devices included a software overlay called "TouchWiz," which was later revamped and called simply "Samsung Experience." In 2019, it was redesigned again and the name was changed to "One UI." One thing that's different about One UI compared to previous overlays is that it's available on smartwatches. Early Samsung smartwatches ran pure Tizen without any overlay. In 2019, Samsung added One UI to smartwatches as well. How Do Tizen and One UI Work Together?As previously mentioned, One UI can only exist on top of an operating system. That operating system is either Android (phones and tablets) or Tizen (smartwatches). Let's look at Samsung Galaxy smartwatches as an example. When a notification appears on your watch, Tizen is what enables that communication between your phone and watch. One UI is responsible for the appearance of the notification. Tizen and One UI exist together on Galaxy smartwatches, but they're separate as well. Each software layer can be updated independently of the other. If you look in the "About Watch" software section, you'll see that each has its own version number.
Tizen updates are typically larger and will include major features, whereas One UI updates bring visual tweaks and smaller enhancements (There are some exceptions to this rule.). While they can be updated separately, it's common for Tizen and One UI updates to be bundled together. At the end of the day, both Tizen and One UI have a lot of features, but bringing them together is what creates a great software experience. |

| You are subscribed to email updates from My Blog. To stop receiving these emails, you may unsubscribe now. | Email delivery powered by Google |
| Google, 1600 Amphitheatre Parkway, Mountain View, CA 94043, United States | |


0 nhận xét:
Đăng nhận xét