How to Sideload Apps on Google TV |
- How to Sideload Apps on Google TV
- How to Add Block Quotes in Microsoft Word
- How to Use DB Browser for SQLite on Linux
- How to Control Android Device With Your Eyes Using ‘Look To Speak’
- How to Wipe Your Browsing History Automatically in Safari on Mac
- When Will Google Delete Data in Inactive Accounts?
| How to Sideload Apps on Google TV Posted: 16 Dec 2020 08:44 AM PST
Google TV devices have access to Android apps and games specifically made for TVs. If you want an app that doesn't appear in the Play Store on the TV, you can "sideload" it. We'll show you how to do it. Apps and games that haven't been specifically enabled for TVs won't show up in the Play Store on your Google TV device. However, that doesn't mean that they won't work on the TV. You'll just have to download them from someplace else. That's where sideloading comes in. Sideloading is the act of installing an app from outside the Play Store. Rather than the Play Store handling the download and installation process, you'll have to do it manually. Sideloading on Google TV is a little different than on Android TV. RELATED: What’s the Difference between Google TV and Android TV? Before we can do any sideloading, you'll need to download an app. APK Mirror is a trusted source for downloading apps, and you won't be pirating. Visit the website, find the app you want, and download the APK file. After downloading the APK, you'll need to move it to Google TV. The easiest way to do this is with a cloud storage service such as Google Drive. Upload the file to the Drive website or mobile app. Lastly, you'll need a way to access your Google Drive on the TV. We recommend an app called "File Commander," which is what we'll be using in this guide. Download the app and sign in with your Google account.
The first step in sideloading is enabling the ability to install apps from unknown sources, which is disabled by default as a security feature. First, select your profile icon in the top-right corner of the Google TV home screen.
Select "Settings" from the menu.
Scroll down and select "System."
Next, click "About" from the System settings.
Scroll all the way down to "Android TV OS Build" and select it repeatedly until a message appears and says "You Are Now A Developer."
You have now enabled the Developer Options, which makes it possible to allow installing apps from unknown sources. Next, go back to the main Settings menu and then select "Apps."
Scroll down to the bottom and select "Security & Restrictions."
Navigate to "Unknown Sources."
Lastly, toggle the switch on for "File Commander." If we hadn't enabled Developer Options first, this option would be grayed out.
Now that we've enabled installing apps from unknown sources, we can finally sideload. Open File Commander on your Google TV and navigate to the Google Drive section.
Locate the APK file you previously moved and select it.
On the pop-up message, click "Install."
After it has finished installing, select "Open."
It's important to remember that not all apps or games will work correctly on Google TV. Some will be completely broken, while others won't be functional with a remote. However, plenty of unsupported apps work fine. You'll just have to test and see. |
| How to Add Block Quotes in Microsoft Word Posted: 16 Dec 2020 06:30 AM PST
Block quotes are used to indent and separate a quoted comment from your own writing. Unlike normal indents, adding block quotes in Microsoft Word requires some additional steps. Because academic writing is written to strict styling standards, the requirements for block quotes in Word differ from style to style. Thankfully, you can tweak the size of any indents by using the ruler bar or by using the "Paragraph" settings in the "Layout" menu or "Paragraph" settings window. RELATED: How to Use Rulers in Microsoft Word Using the Layout MenuThe quickest way to add block quotes to a Microsoft Word document is to use the "Paragraph" settings that are visible in the "Layout" tab on the ribbon bar. To add a block quote using this menu, open your Word document and select your quote text. From the ribbon bar, click the "Layout" tab to display the "Paragraph" settings.
Block quotes in both the APA and MLA style must start on their own line and have indents to the left that are 0.5cm in size. In the APA style, block quotes must be at least 40 words in length, while in the MLA style, quotes must be at least four lines long. If you use a different academic style, please refer to your style guide to ensure that the indent sizing you use is correct. As both APA and MLA use 0.5cm indents for block quotes, set the "Left Indent" value to "0.5 cm" and hit the enter key to confirm. Alternatively, use the arrow buttons on the right to increase the indent sizing using increments of 0.1cm.
This will change the indent size for the text you selected, creating a block quote in the process. You can then add formatting, such as italics, to make the text stand out further. You'll need to repeat these steps for each additional block quote you add to your document. Using the Ruler BarIn earlier editions of Microsoft Word, the easiest way to add a block quote to a Word document was to use the ruler bar, which shows the margins and indents currently in use. However, the ruler bar is no longer visible by default in more recent versions. While it remains a quick and easy method for adding a block quote, you'll need to enable the ruler bar first. To do this, open your Word document and click the "View" tab on the ribbon bar. In the "Show" category, select the checkbox next to the "Ruler" option to enable the ruler.
This will display the ruler at the top and to the left of your document. The areas in white are within the print area of the document, matching the margins of the document page. Each point on the ruler is 0.25cm in size. To set a block quote indent, select your quote, then drag the hourglass-style icons on the top of the menu bar until both the top and bottom icons sit at the 0.5cm point.
This will create a block quote indent that is 0.5cm in size, suitable for APA and MLA academic style documents. Using the Paragraph Settings MenuYou can also use the "Paragraph" settings menu in Microsoft Word to set a block quote indent. To do this, select the text containing the block quote in your document, right-click the text, then choose the "Paragraph" option from the menu.
In the "Indents And Spacing" tab of the "Paragraph" menu, you can apply an indent to your selected text. As APA and MLA block quotes require 0.5cm left indents, set the "Left Indentation" value to "0.5 cm" and hit enter. If you're using another academic style, check your style quide for the correct sizing to use here. You can type the value manually or use the arrow keys on the text box to increase the indent in 0.1cm increments.
Click "OK" to save your settings and apply the block quote indent to your selected text.
Once saved, the 0.5cm indent will be applied to your text, creating a block quote in the process. You'll need to repeat these steps for each additional block quote you add to your document. |
| How to Use DB Browser for SQLite on Linux Posted: 16 Dec 2020 05:27 AM PST  DB Browser for SQLite lets you view and edit SQLite databases on Linux. You can design, create, and edit these database files, and peek inside the inner workings of other applications. Here's how to use this SQLite GUI. The SQLite Database Project |
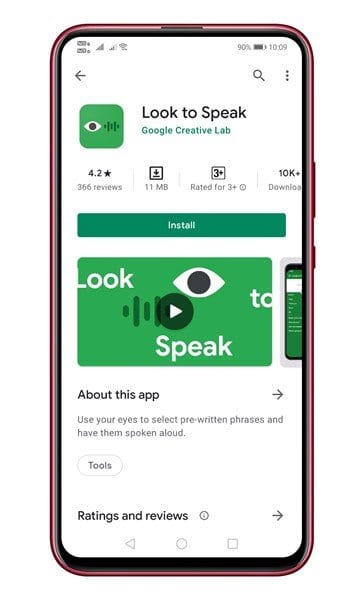
| How to Control Android Device With Your Eyes Using ‘Look To Speak’ Posted: 15 Dec 2020 10:12 PM PST People with speech impairments can now use Google's Look to Speak Android app to communicate with others. Google recently launched a new app known as 'Look To Speak.' With this app, users can make their Android smartphone speak phrases out loud just by using their eyes. The app is based on Eye Gaze technology that uses your phone's camera to pick up your pupils' light reflections and translate your eyes' movement into actions. Previously, the technology is only limited to desktop computers, but with Look to Speak, Google somehow managed to bring the technology to smartphones. You can ask your Android device to speak pre-written phrases aloud by moving your eyes with Look to Speak. We have downloaded the app and found that it's working, but it's not 100% accurate. Sometimes it fails to detect eye movement. Also read: How To Control Your PC Using Android Device Steps to Control Android Device With Your Eyes Using 'Look To Speak'To Set up Look To Speak on Android, you need to position your Android device below the eye level. Google recommends the use of a phone mount for a better app experience. This article will share a detailed guide on how to download & install Look to Speak on Android. Let's check out. Step 1. First of all, download & install Look to Speak on Android.
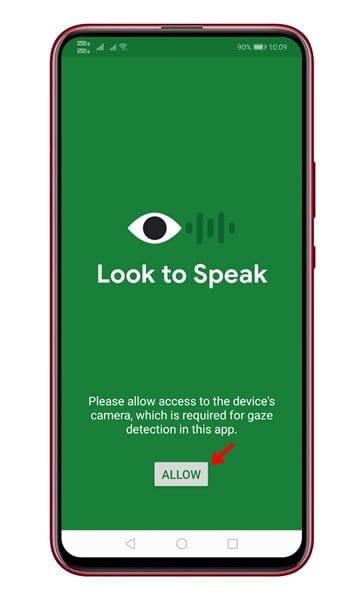
Step 2. Once installed, open the app and grant the camera permission.
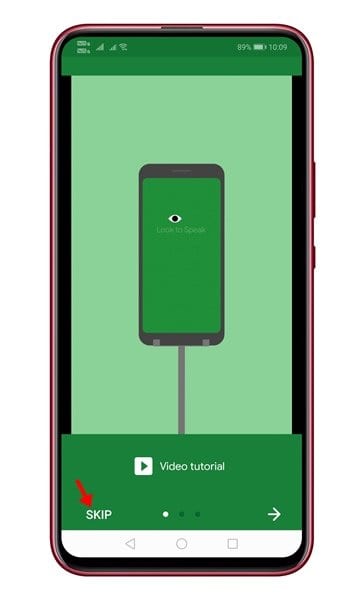
Step 3. Now the app will show you a video guide on how to use the app. Simply go through the tutorial or tap on the 'Skip' button.
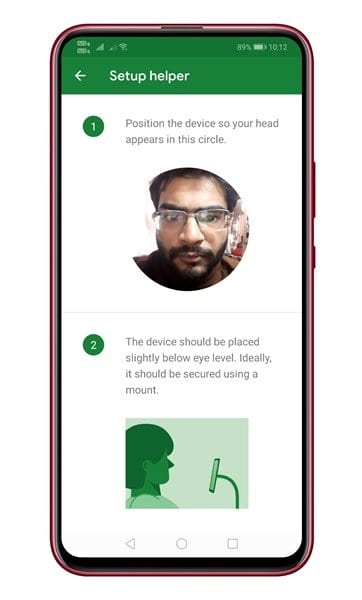
Step 4. Now you need to position the device, so your head appears in the circle.
Step 5. Once done, you will now see the main interface of the app. Simply select the phrase with the eye movement. Once you select the list of phrases by looking left, right, or up. Google will narrow down the words, leaving only one to pick.
That's it! You are done. This is how you can control Android with your eyes using the Look to Speak app. This article is all about how to control Android with your eyes using Google's Look to Speak. I hope this article helped you! Please share it with your friends also. If you have any doubts related to this, let us know in the comment box below. |
| How to Wipe Your Browsing History Automatically in Safari on Mac Posted: 15 Dec 2020 01:24 PM PST
Your browser records all your web activity. Therefore, for added privacy, it's best to regularly clear your browsing history. Safari on your Mac can take care of this for you and automatically wipe your history every once in a while. Here's how to set it up. Launch Safari on your Mac from the Launchpad or by looking it up on Spotlight. Next, click "Safari" from the left corner of the menu bar and select "Preferences." Alternatively, you can press Cmd+comma on your keyboard to head directly into this menu.
Under the "General" tab, locate the "Remove History Items" option.
From the dropdown beside it, you can select how often Safari should delete your browsing history. You can have it cleared as frequently as every day or every year.
When you enable this setting, Safari automatically wipes logs of the websites you visit, your web searches, and more. If you prefer reviewing your browsing history before clearing it, you can choose "Manually" from the dropdown and periodically erase your web activity from Safari yourself. At the bottom of the "General" section, you'll also find a separate setting called "Remove download list items." With this option, you can configure Safari to automatically remove the list of files you downloaded (but not the files themselves).
You can have them wiped after a day, as soon as you quit Safari, or when the download is unsuccessful.
Enabling these won't affect your Safari browsing data on other Apple devices such as an iPhone or an iPad. As of yet, the options to automatically wipe your browsing history and the download list are not available on Safari's iOS and iPadOS apps. There's a lot more you can do for a more secure experience on Safari, including browsing in incognito mode by default and optimizing it for maximum privacy. |
| When Will Google Delete Data in Inactive Accounts? Posted: 15 Dec 2020 10:06 AM PST
If you have an account with Google cloud services, such as Photos, Drive, or Gmail, your content is subject to being deleted. Inactive accounts will have their data cleaned up after a certain amount of time. Google's storage policies are intended to clean up inactive accounts to make the experience better for everyone else. In other words, Google doesn't want people who aren't using its services to clog things up for people who are. RELATED: Google Will Delete Your Photos and Documents if You Aren’t Active Enough The good news is the cutoff time for inactive accounts is pretty generous. So, there's no reason to worry if you don't sign in every day, or even every month. What Counts Toward My Google Storage?Before we dive into the timelines, you should know what actually counts toward your storage allotment. As always, Google Drive, Google Photos, and Gmail count. Beginning June 1, 2021, however, the following will also count:
However, anything uploaded to these services before June 1, 2021, will not count; only files that are modified after that date will. How Long Until My Data Is Deleted?Starting June 1, 2021, Google will also implement a few new policies for deleting data on inactive accounts. Google might delete data in the following circumstances:
The two-year countdown begins on June 1, 2021. So, if you're inactive, 2023 is the earliest anything would be deleted. Google will also send you multiple alerts before anything is removed. How Do I Keep My Google Account Active?You might be wondering what you have to do to keep your account from becoming "inactive." Well, it's simple. Just visit Gmail, Google Drive, or Google Photos while signed in to your Google account on the web or mobile. That's it! You don't actually have to do anything in the services. Generally, this isn't something anyone who even occasionally uses Google services needs to worry about, though. These policies are intended for people who have completely moved on from their Google accounts. |


| You are subscribed to email updates from My Blog. To stop receiving these emails, you may unsubscribe now. | Email delivery powered by Google |
| Google, 1600 Amphitheatre Parkway, Mountain View, CA 94043, United States | |


0 nhận xét:
Đăng nhận xét